
Discover all the affiliate secrets from the mVAS perspective!
Affiliate marketing from Beginner to Advanced
-
Part 1 - The basics of affiliate marketing
-
Part 2 - The affiliate network
-
Part 3 - Tracking Lessons
- Intro
- Adding Golden Goose network to your tracker
- Adding Golden Goose offers to your tracker
- Placing a Global Postback
- Placing postbacks for individual offers
- Adding landing pages to your tracker
- Adding Traffic sources to your tracker
- Building a campaign in your tracker
- Configure traffic back Campaign URL
-
Part 4 - Market Research and landing pages
-
Part 5 - Pop Traffic
-
Part 6 - Push Traffic
-
Part 7 - Additional Resources
Set up hosting for landing pages
Every time you’re using landing pages instead of directly linking to an offer, you’re going to need a web host to deploy them online. There are many web hosting solutions available and I can’t recommend you a “best” option because to be fair, there are many great services out there.
If you’re familiar with web hosting because you have a background in website design, being a blogger, etc. this step is going to be easy for you. You just need to set up a new domain for your landing pages and upload your files via FTP or SSH without any issues.
No website builders or WordPress needed. Just remember to grab a new domain, separated from all of your other projects, and also install the SSL certificate to comply with all of the traffic source’s requirements.
That’s it.
Now, if your head started spinning when I said FTP, SSH, SSL, and HTML, you’re in luck because today I’m going to show you how I set up my landing pages in a fast server for your campaigns.
The first thing I need to remind you is that while there are no “best” hosting services, there are a ton of horrible “worst” hosting services.
You want to avoid any shared server hosting service and also possibly avoid any of the big popular companies, such as Hostgator, GoDaddy, Bluehost, etc.
As for domains, you can use pretty much any service but I recommend using Namecheap or any service that doesn’t charge you for the whois service.
I usually deploy my landing pages using a combination between Vultr (host) and Namecheap and then I connect them with ServerPilot to implement the SSL certificate. Let’s quickly see how I do this.
Grabbing a domain
You need at least one or two domains if you want to host landing pages yourself to promote CPA offers. A domain name is cheap and can start at around $5 per year. The domain name doesn’t matter much, as you are not going to build a brand or a big website with it. You just need the domain to host simple landing pages or to redirect users through your tracker.
For domain names, I like to use Namecheap because they have regular promos and also include the whois privacy for free. While most companies offer this for free, there are a few ones that still charge you an extra for your privacy. Avoid them.
Go to namecheap.com and look for a domain name to see if it’s available:

Your domain name can have different extensions such as .com, .net, or many more. It doesn’t matter, however, if you can grab a .com or any of the well-known TLDs it might inspire more trust in the eyes of your visitors.
As for the name itself, you can use large domain names without issues. Again, since you’re using it just as a bridge between your traffic source and your affiliate offer, it won’t matter much.
Buy a domain from Namecheap and follow all the steps as requested. We will come back to set it up later. But for now, it’s time to acquire our server.
Launching a VPS on Vultr
Now that we have a domain name, we need a server to host our landing pages. There are many hosting companies available worldwide and it’s up to you to decide which one to use, however, I’ll show you how to quickly set up and create a server with Vultr.
Vultr is an unmanaged hosting service that allows you to create Virtual Private Servers (VPS) and pay them by the hour. This can be very helpful because you don’t get stuck in monthly or annual contracts and you can quickly destroy and create new servers to test your campaigns.
Most services like Vultr start at $5 per month, which I’d say is pretty cheap. If you’re a beginner you don’t need to pay hundreds of dollars for a server at this point.
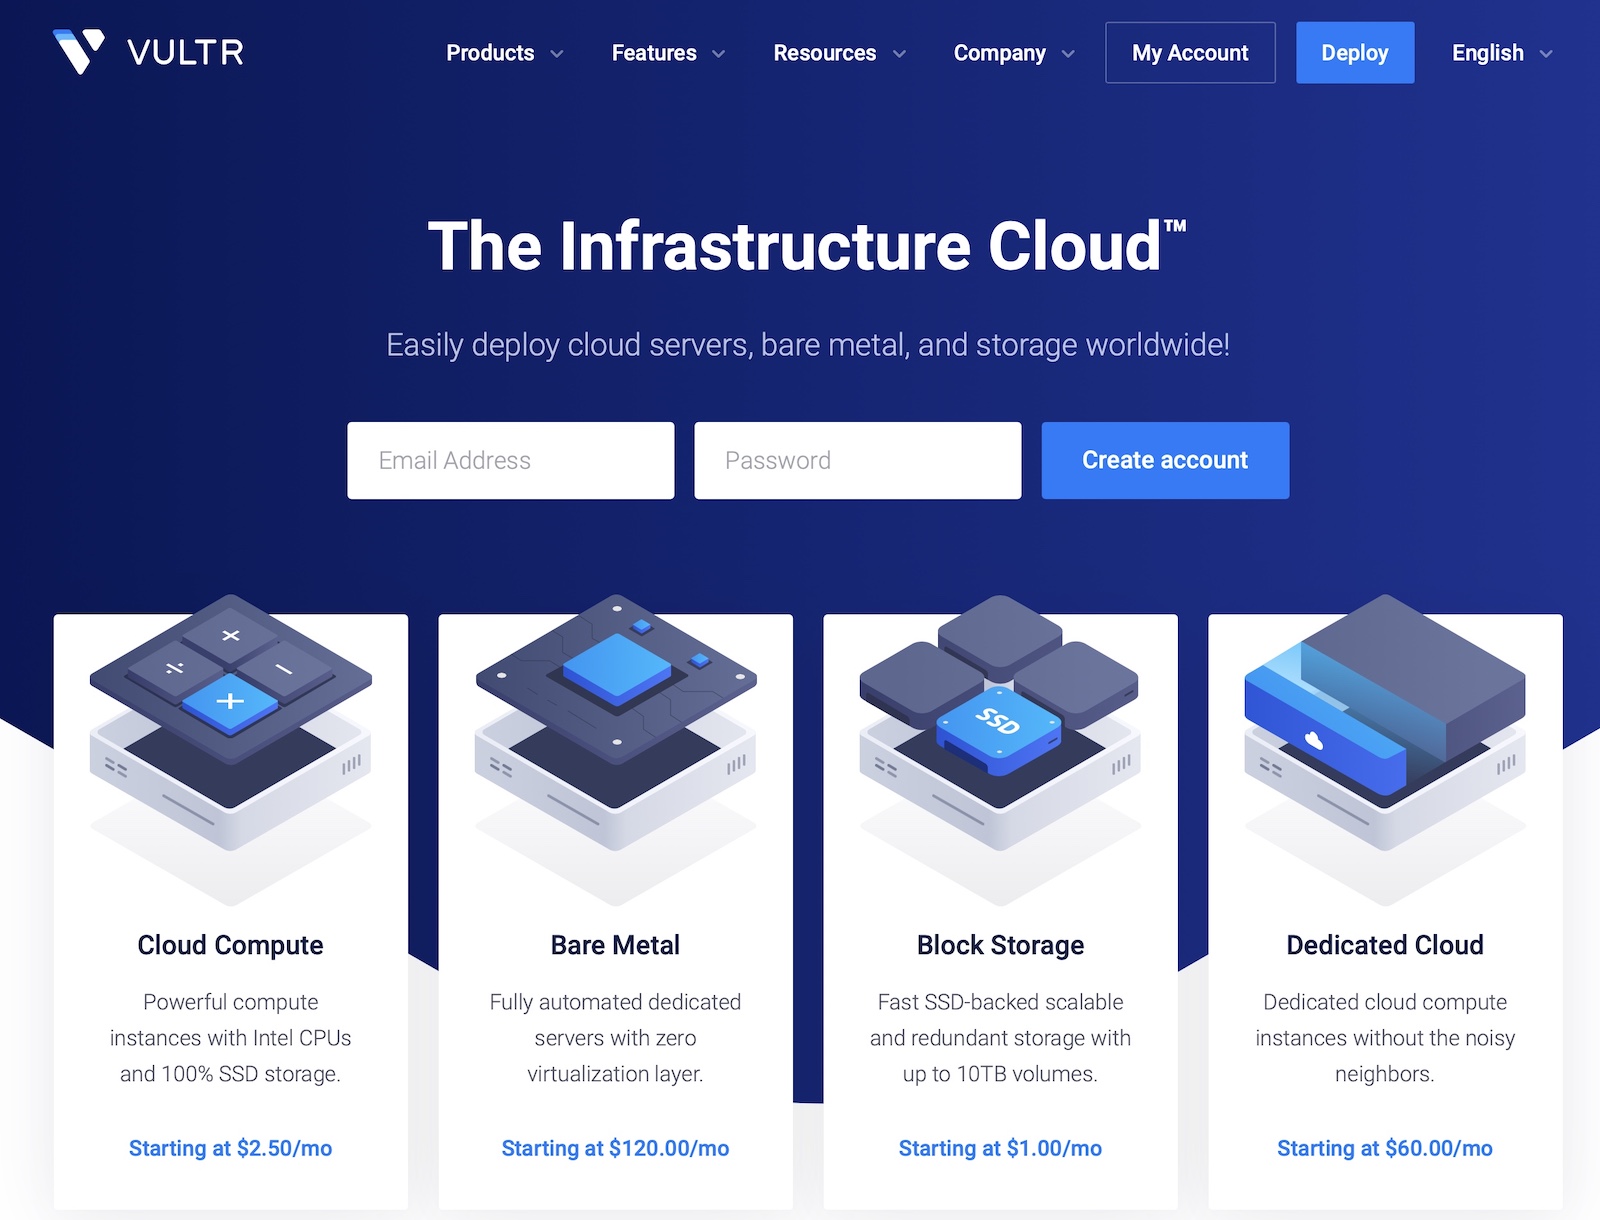
Go to Vultr and create an account to deploy a cloud compute instance:
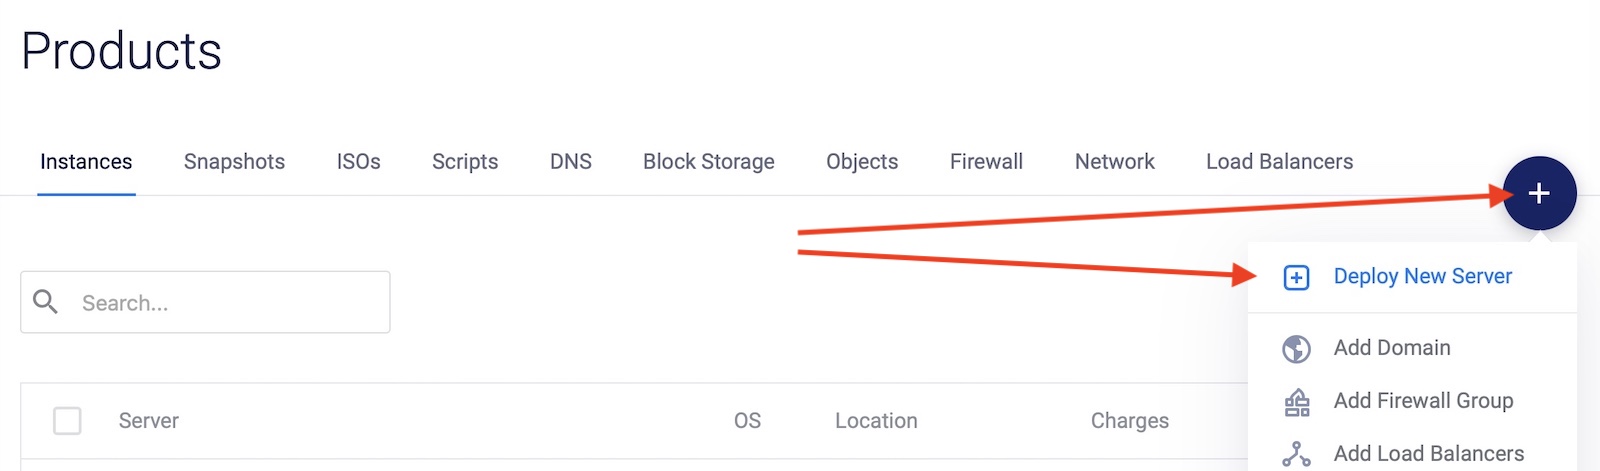
Once your account is approved and you can log in to your dashboard, click the + button and select “deploy new server”:
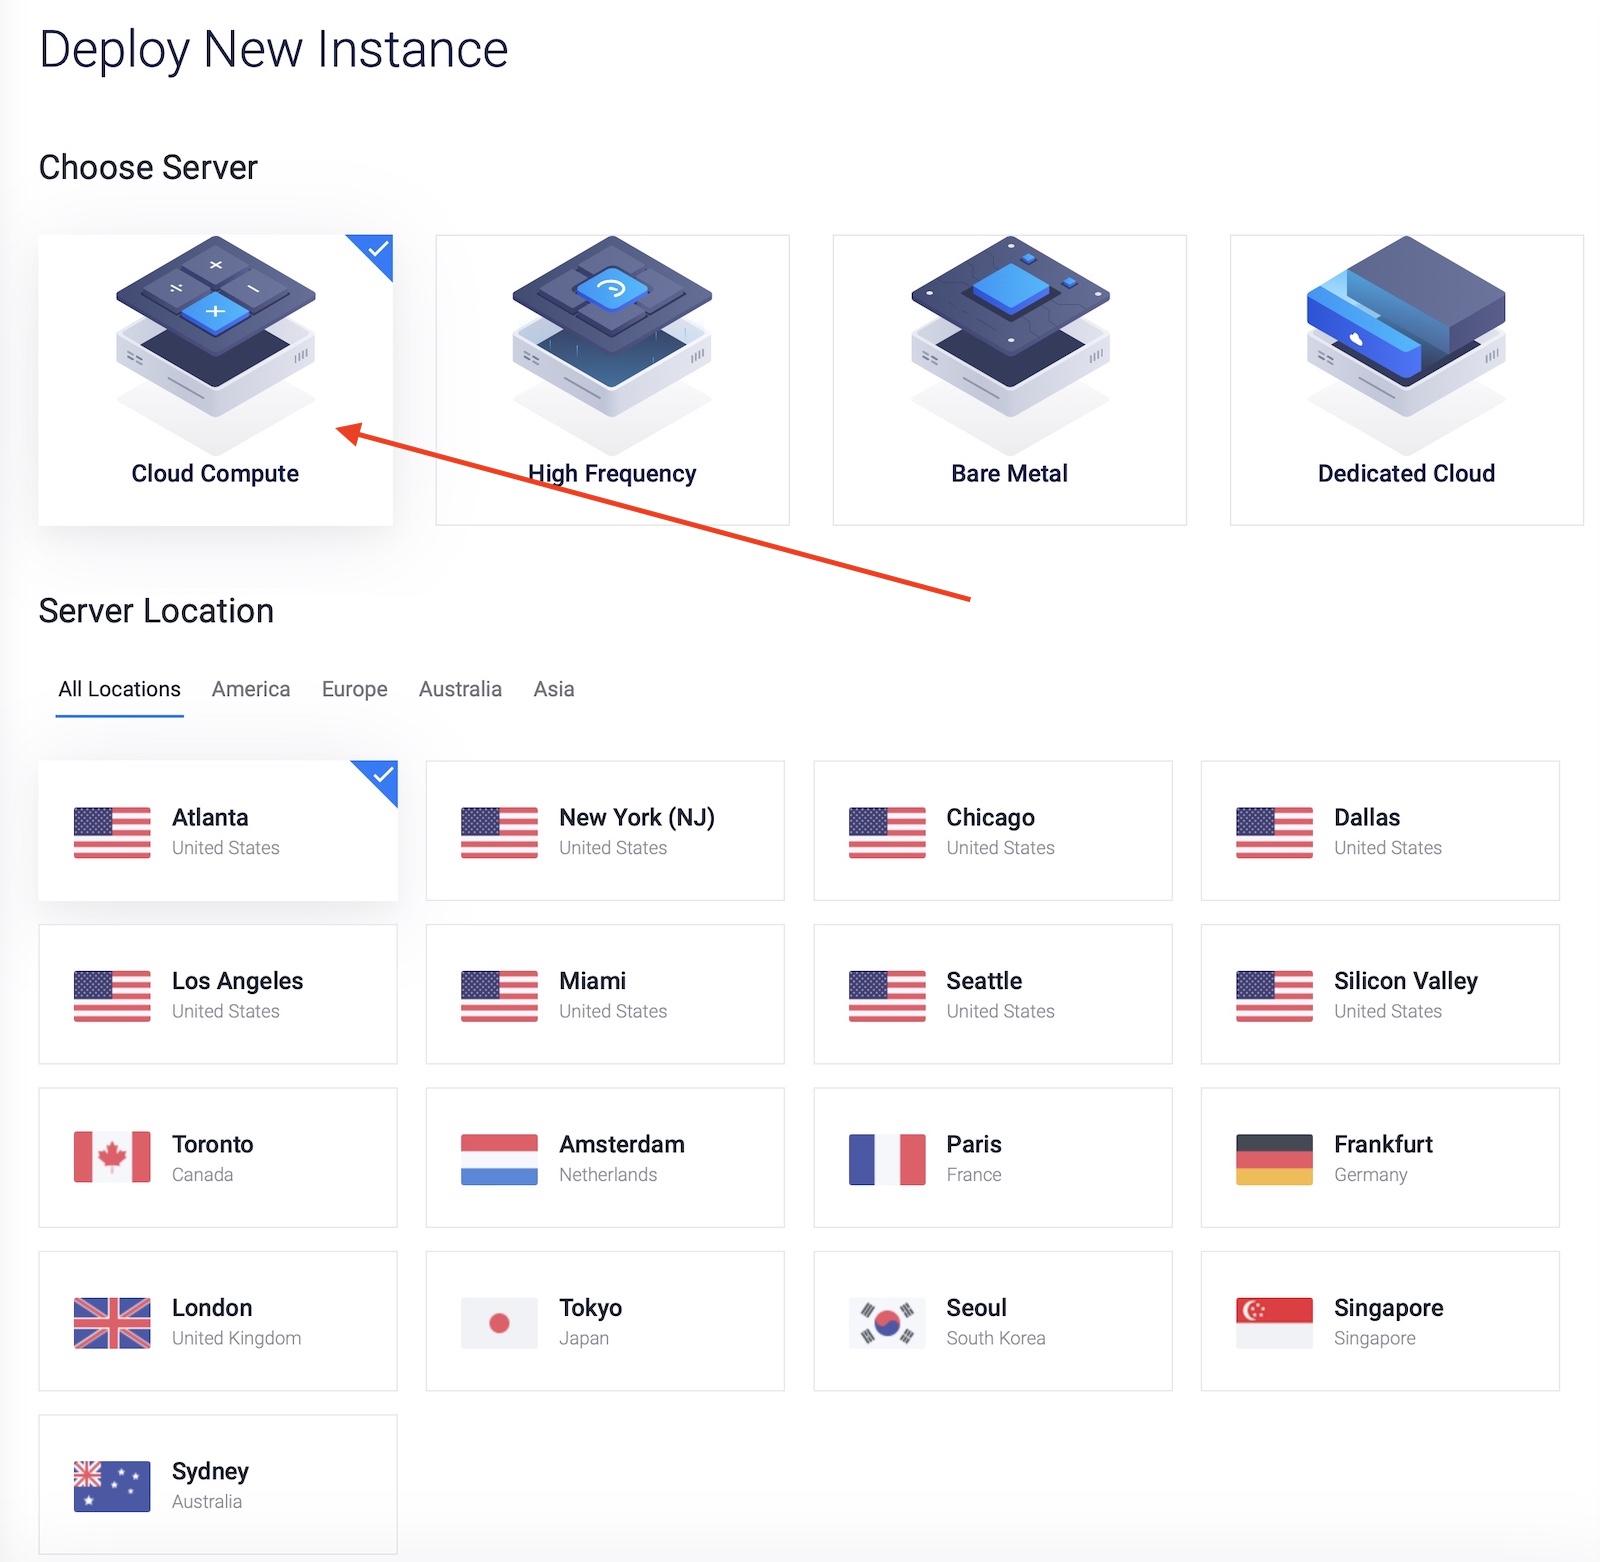
Now you will need to select a few options to create your server. First, you need to choose a server type. Select the cloud compute or high-frequency server as both work well for this purpose.
Also, select a location as close as possible to the country where you want to run your traffic. If you’re planning to run traffic from multiple geos you can choose a location in between them (e.g. Germany for all European traffic or Dallas for all USA traffic).
You can also create multiple servers for your tests in different locations and destroy them once you find which one performs best for your campaign. There’s no need to have multiple servers running all at the same time if you’re not even running profitable campaigns, so for beginners, one server should be enough.
Scroll down and select the server type:

As you can see, I have selected Ubuntu 20.04 as my operating system and also I’m choosing the $5 per month VPS. After that, click the “deploy now” button and give Vultr a few minutes to create your virtual server in the cloud.
Vultr will send you an email with your VPS information once the server is created, but to be sure, give it 15 minutes after that as the server might still be in process. Meanwhile, you can start working on the next step.
Pointing your domain to Vultr
Now that we have a domain name and a hosting service, we need to connect them. This is done by pointing the DNS settings to your new server’s IP address.
Log in to your Namecheap account and go to your “domain list” and select the domain you just bought. The following menu will appear:
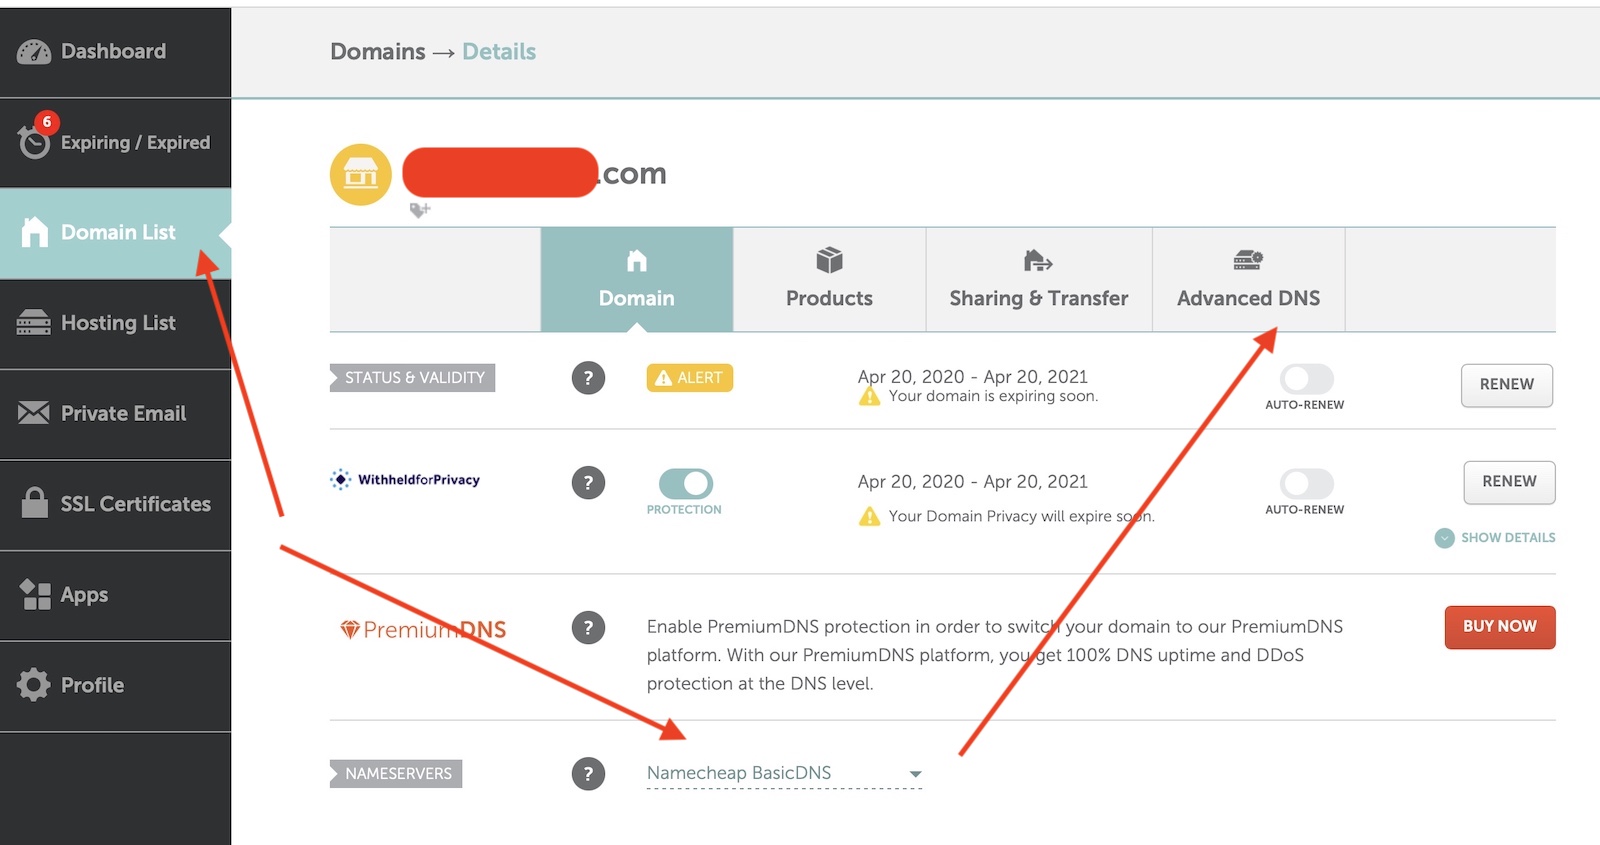
Here, you just need to make sure your nameservers are set up as “Namecheap BasicDNS”. It’s set by default for new domains, but if for some reason it’s not then change it and save the settings.
Now go to the “advanced DNS” menu as shown above. You’ll see the following settings:
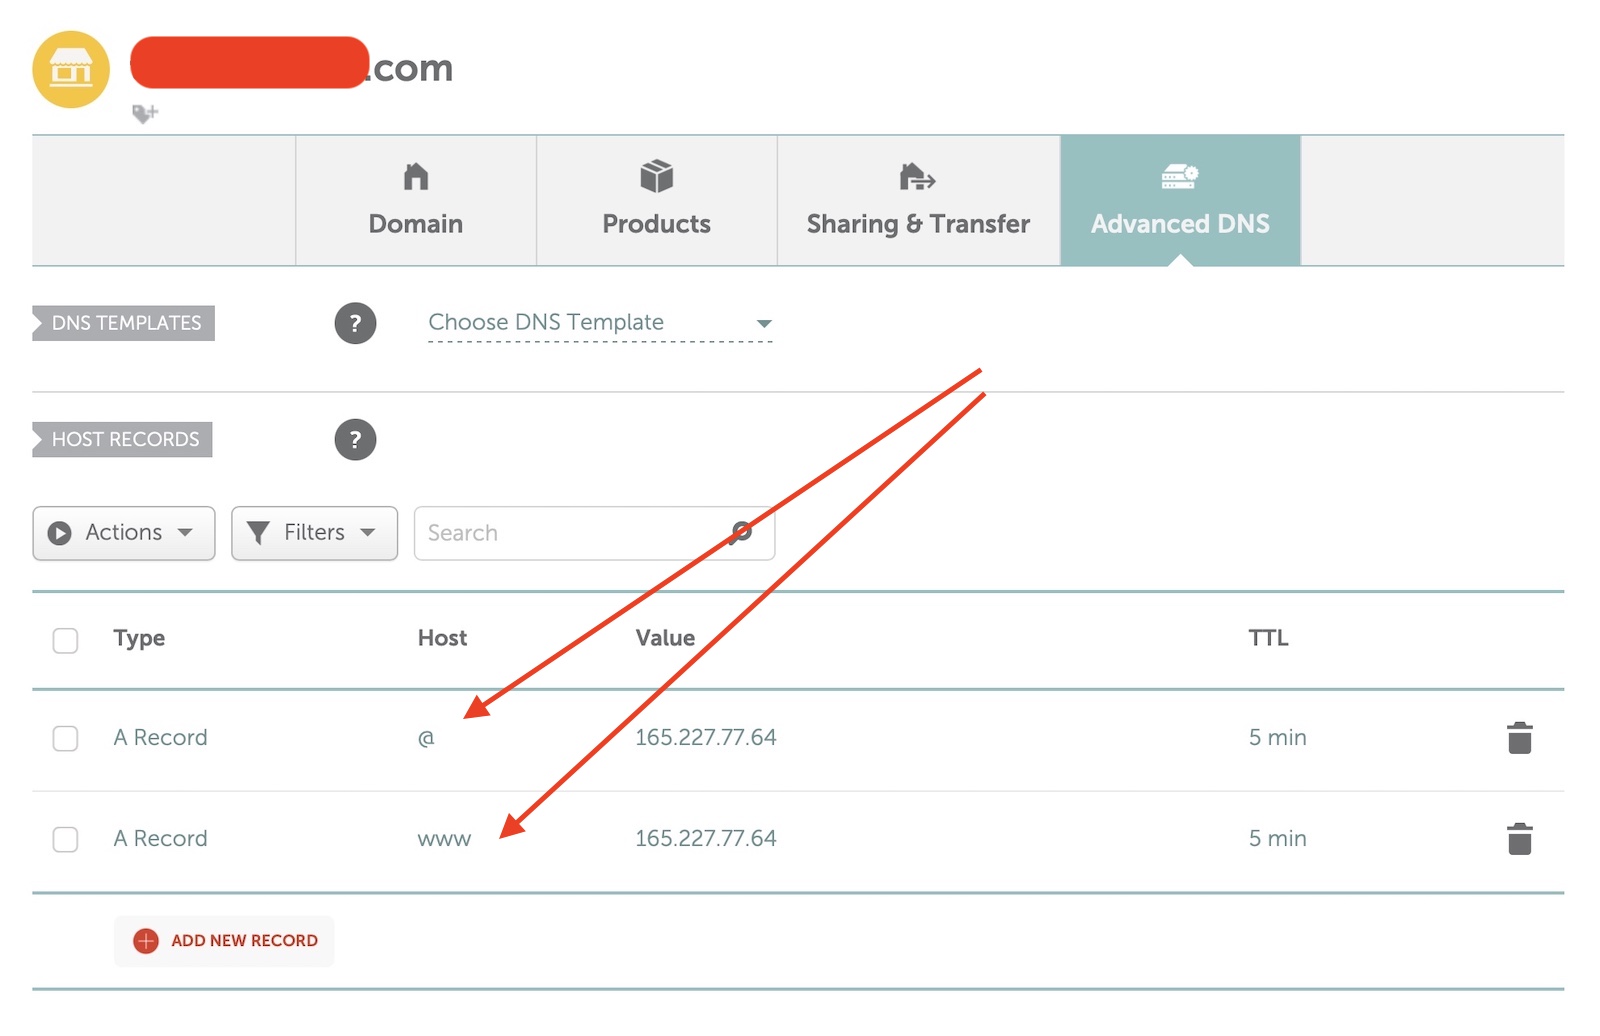
Namecheap automatically populates your domain records with the ones they have by default but you need to delete them and add two new A records.
Both will point to your new VPS IP address. You can find this IP address in the email Vultr sent you when your server was created or by login into your Vultr’s dashboard and selecting your new VPS.
As for the host, one needs to be set as “@” and the second one needs to be set as “www”. Set the TTL as 5 minutes to see changes as soon as possible. Your setup will look the same as the image above but with your own server IP address.
After that, click the “Save settings” button and your domain will be connected to your VPS. At this point, it’s better to wait a couple of hours just to make sure the DNS settings are propagated around the world. This process can take up to 24 hours, but for new domains, an hour or two is usually enough.
Now we need to add an SSL certificate to your domain and after that, we will be able to upload our landing pages to our new shiny server.
Connecting Vultr to ServerPilot
There are many ways to add an SSL certificate to your website. Some hosting services let you add it for free, some charge an extra amount. It can be a technical issue for beginners who are not comfortable writing code in a terminal or who are scared of logging in to Linux/Ubuntu to write some commands.
Therefore, I recommend using Serverpilot to make this process as simple as possible.

Serverpilot costs $5 per month and it lets you add an SSL certificate in a couple of clicks, which is great for beginners. Once you create an account, click the “connect server” button inside your dashboard:

Serverpilot will guide you through everything you need to connect your new VPS from Vultr by requesting you the IP and password of your VPS. Once you’ve gone through all the steps (should take 5 minutes max), you will finally be able to add an SSL certificate with two clicks as shown below:

I have a complete guide in my blog on how to do this step by step if you’re interested.
Congratulations! You have added an SSL certificate to your server now. Let’s move to the last part of this section.
Adding landing pages to your server via SSH
The final step in terms of landing pages is to upload them to your newly created VPS so that you can add them to your tracker and start sending traffic.
This is done by using an FTP client, such as Filezilla or Cyberduck. I’m going to show you how to use Cyberduck (free) to upload your landing pages.
First, download Cyberduck from the official website and install it on your computer. Now open it and create a “new connection”. You will need to fill up the following fields:
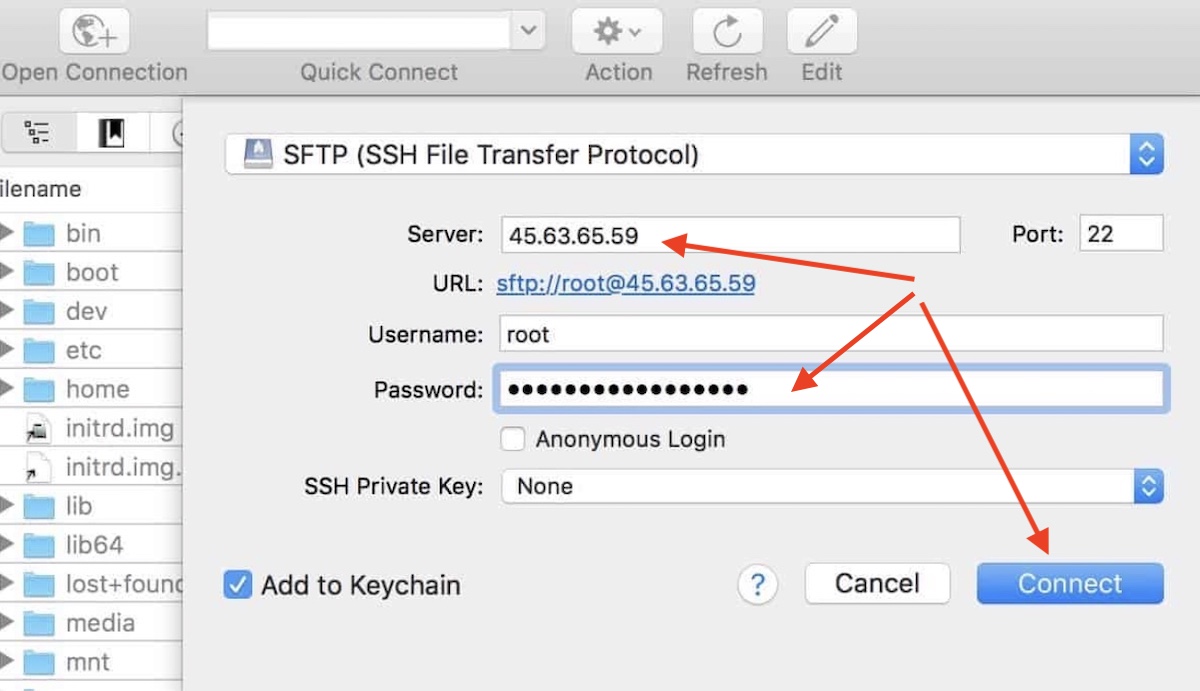
Select the SFTP protocol to connect to your server and then you will need your server IP. This is the same IP you use to connect your server to Namecheap and ServerPilot.
After that, you will need to input the username and password. The username by default is “root” on every Vultr VPS, and your password can be found in your Vultr’s dashboard.
Click “connect” and accept the following prompt.
Now you will see your server’s folders where you can upload your landing page files. Go to the following address:

/srv/users/YOURUSERNAME/apps/YOURAPPNAME/Public
Replace YOURUSERNAME with the username you created in ServerPilot and YOURAPPNAME with the name of your app from ServerPilot as well.
Now that you’re located in that folder you can upload your landing page files by dragging them to Cyberduck. After that, you can find your landing pages in your domain and add them to your tracker.
Now that you have completed this step you can finally launch your first CPA campaign.
Search
 Searching...