
Discover all the affiliate secrets from the mVAS perspective!
Affiliate marketing from Beginner to Advanced
-
Part 1 - The basics of affiliate marketing
-
Part 2 - The affiliate network
-
Part 3 - Tracking Lessons
- Intro
- Adding Golden Goose network to your tracker
- Adding Golden Goose offers to your tracker
- Placing a Global Postback
- Placing postbacks for individual offers
- Adding landing pages to your tracker
- Adding Traffic sources to your tracker
- Building a campaign in your tracker
- Configure traffic back Campaign URL
-
Part 4 - Market Research and landing pages
-
Part 5 - Pop Traffic
-
Part 6 - Push Traffic
-
Part 7 - Additional Resources
Building a campaign in your tracker
Now that you have added all the elements in your tracker, the last thing you need to do to properly launch a campaign is to set up a new campaign.
Go to the campaigns menu and click “create”. Then select “campaign simple”:
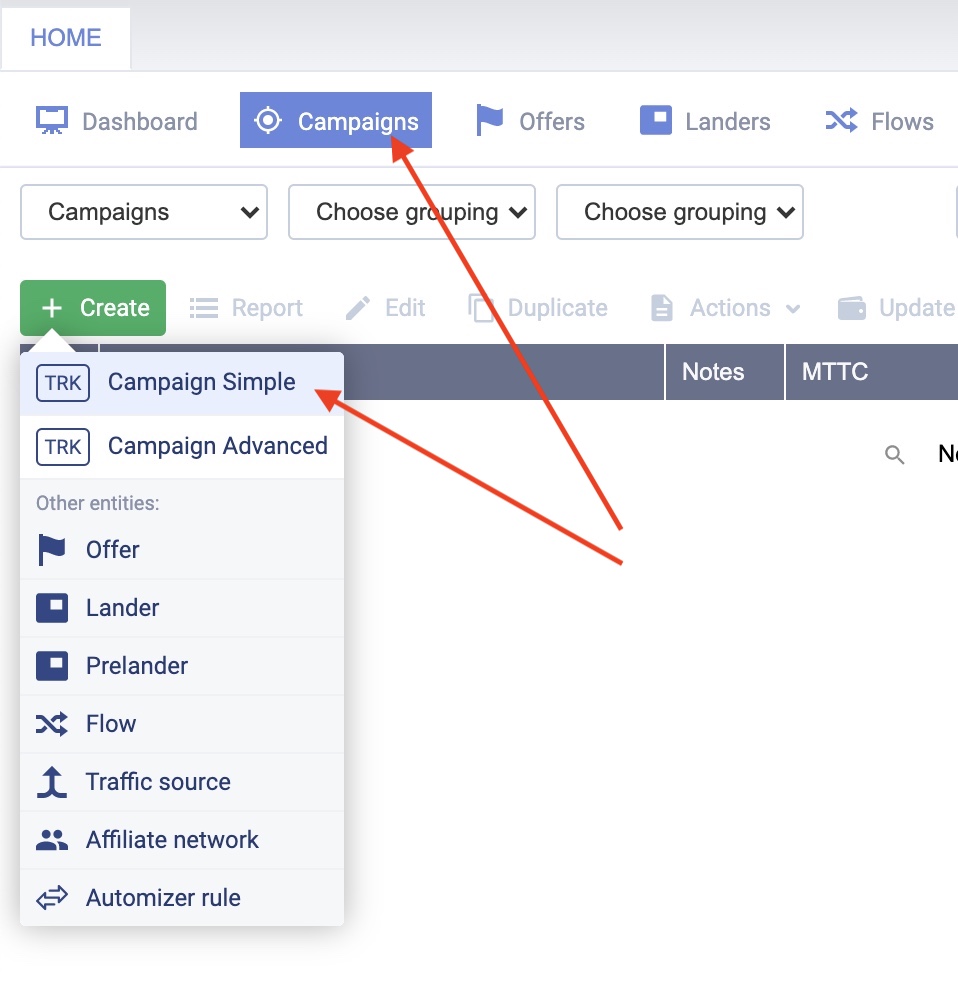
Similar to the other menus, a new pop-up screen will appear where you will be able to select different filters and set up your campaign in your tracker.
Let’s start by giving a name to your campaign, select a traffic source and the country you’re going to choose to run your campaign. Here’s an example:
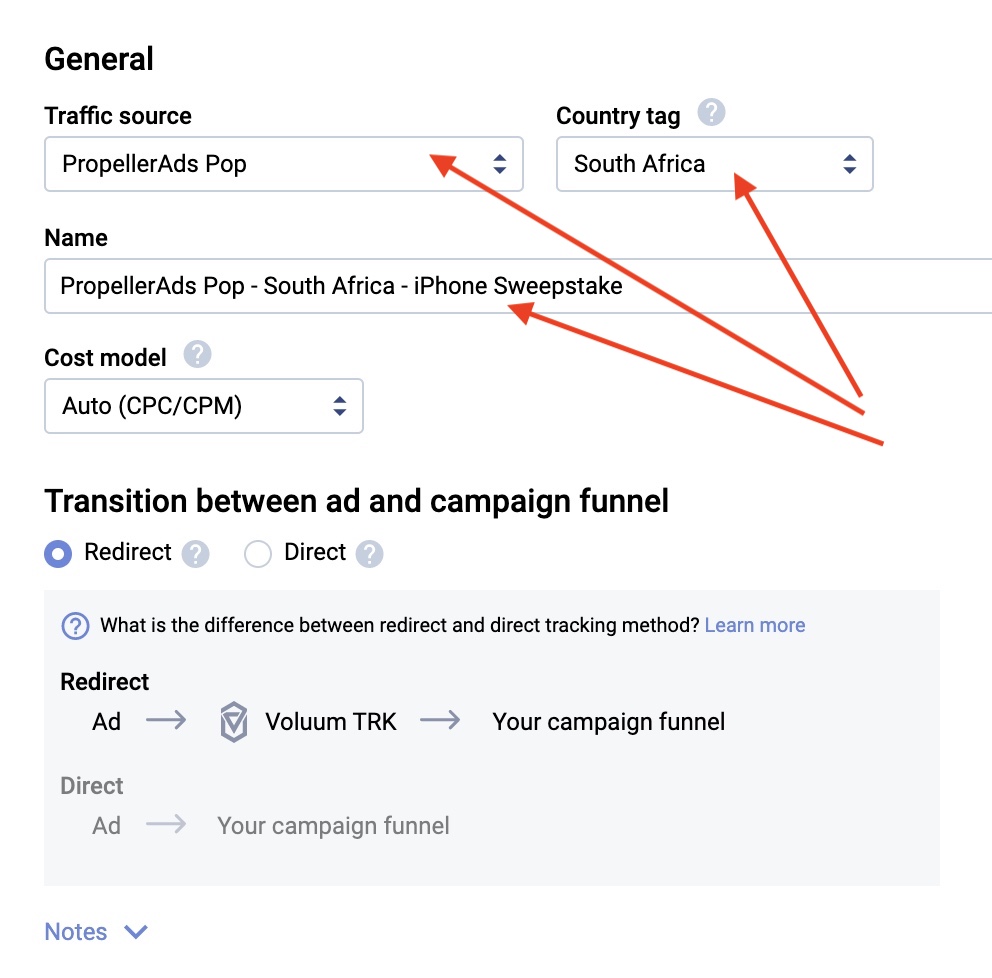
For now, you can leave the cost model on automatic, and assuming you’re using one of the traffic sources we added before, the costs of your ad spend will be shown automatically.
Also, leave the transition between ad and campaign funnel as “redirect”. Now scroll down a bit more and you will see the following fields:

Here, you will need to select a path or a flow. I’ll start with a path because it’s the simplest way to set up your campaign. The path just defines how your traffic is going to be routed through your tracker.
The “path destination” requires you to select if you’re going to use “landers and offers” in your funnel, or just “offers” or a listicle. If you’re directly linking your campaign to an offer without pre-lander, you can select “offers only”.
I’ll show you how to do it with “landers and offers” because landing pages are very important for CPA offers most of the time.
After that, select the landing page you just added to your tracker a few minutes before and also select the offer you added back then.
Keep in mind your campaign’s country settings should be the same as your landing page and offer (South Africa, in this example), or the offers and landers won’t appear to be selected. This helps you keep everything organized when you have dozens or hundreds of offers and landing pages added to your tracker.
If you have a campaign that supports multiple countries you can set the campaign “country tag” as global and then you will be able to select offers and landers from multiple countries.
Once you select your offer and landing page, click “save”. This new menu will appear:

You have now created a campaign in your tracker and you’re almost ready to launch it in a traffic source. See that “campaign URL” from the image above? Copy that URL and paste it into your traffic source settings when you’re creating a campaign.
Don’t copy the landing page URL or offer URL to your traffic source. Always use the campaign URL from a campaign created in your tracker or it won’t work.
Right now we could launch the campaign. However, there are a couple of extra steps I want to go over since we’re working with Golden Goose here. Let’s check them out.
Search
 Searching...