
Discover all the affiliate secrets from the mVAS perspective!
Affiliate marketing from Beginner to Advanced
-
Part 1 - The basics of affiliate marketing
-
Part 2 - The affiliate network
-
Part 3 - Tracking Lessons
- Intro
- Adding Golden Goose network to your tracker
- Adding Golden Goose offers to your tracker
- Placing a Global Postback
- Placing postbacks for individual offers
- Adding landing pages to your tracker
- Adding Traffic sources to your tracker
- Building a campaign in your tracker
- Configure traffic back Campaign URL
-
Part 4 - Market Research and landing pages
-
Part 5 - Pop Traffic
-
Part 6 - Push Traffic
-
Part 7 - Additional Resources
Launching a campaign on PropellerAds
We’re going to use PropellerAds to launch a push notification campaign. PropellerAds was one of the first pop networks to jump into the push notification bandwagon and so far they’re doing well. They also have in-page push traffic and were one of the first ones to launch it as well.
There are many other traffic sources though, so feel free to look for other push notification networks to test.
Head to your account’s dashboard and hit the “create campaign” button at the top/right corner:
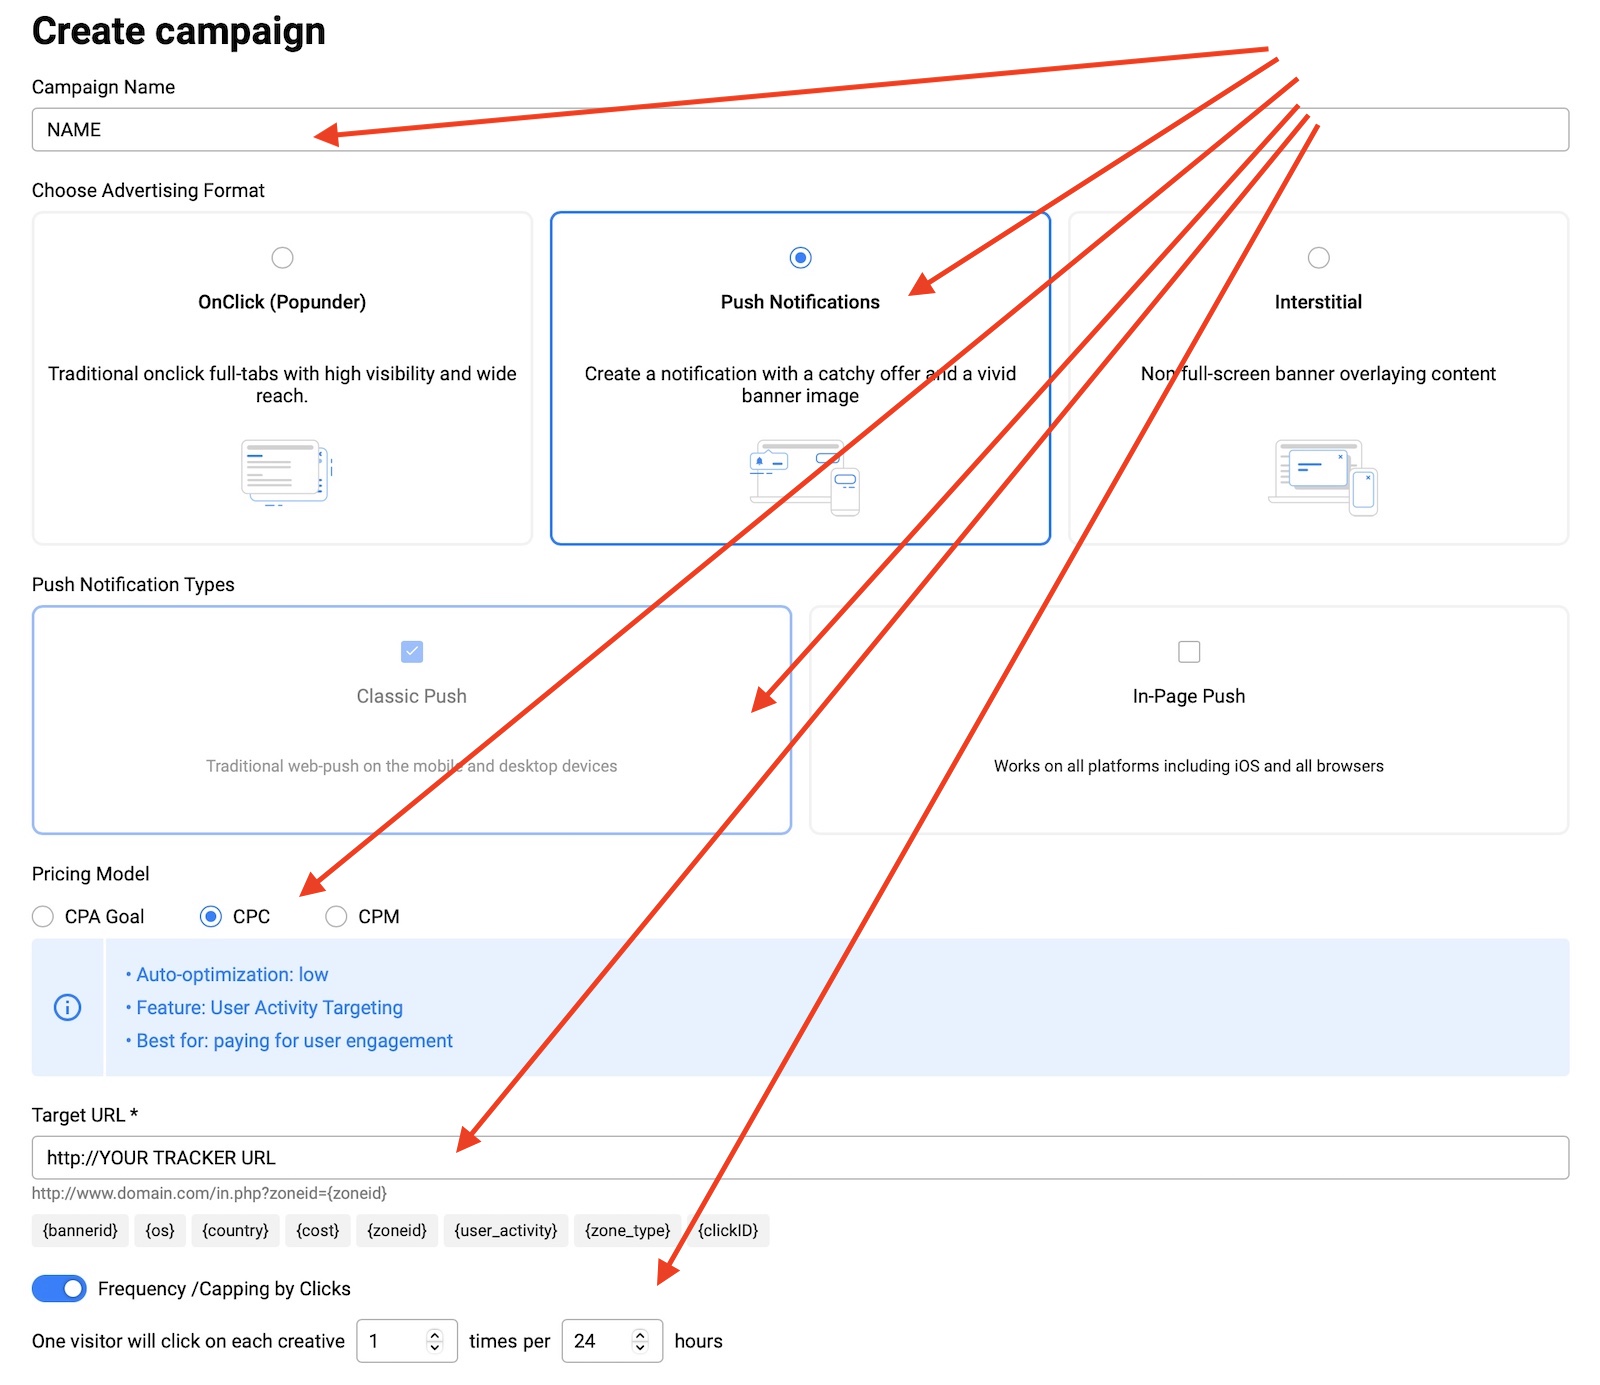
This time we will select “push notifications” as the advertising format instead of popunder.
- Name: campaign name for your organization
- Advertising format: push notifications
- Push notification type: you can select either in page or classic web push.
- Pricing model: CPC
- Target URL: the campaign URL you copied from your tracker in the last step of the tracking section of this guide.
- Frequency: 1/24 hours
If you want to test classic and in-page push ads, make sure you set separate campaigns for each one. Although both formats look similar, they work very differently and they have different bids. Scroll down to the next section:
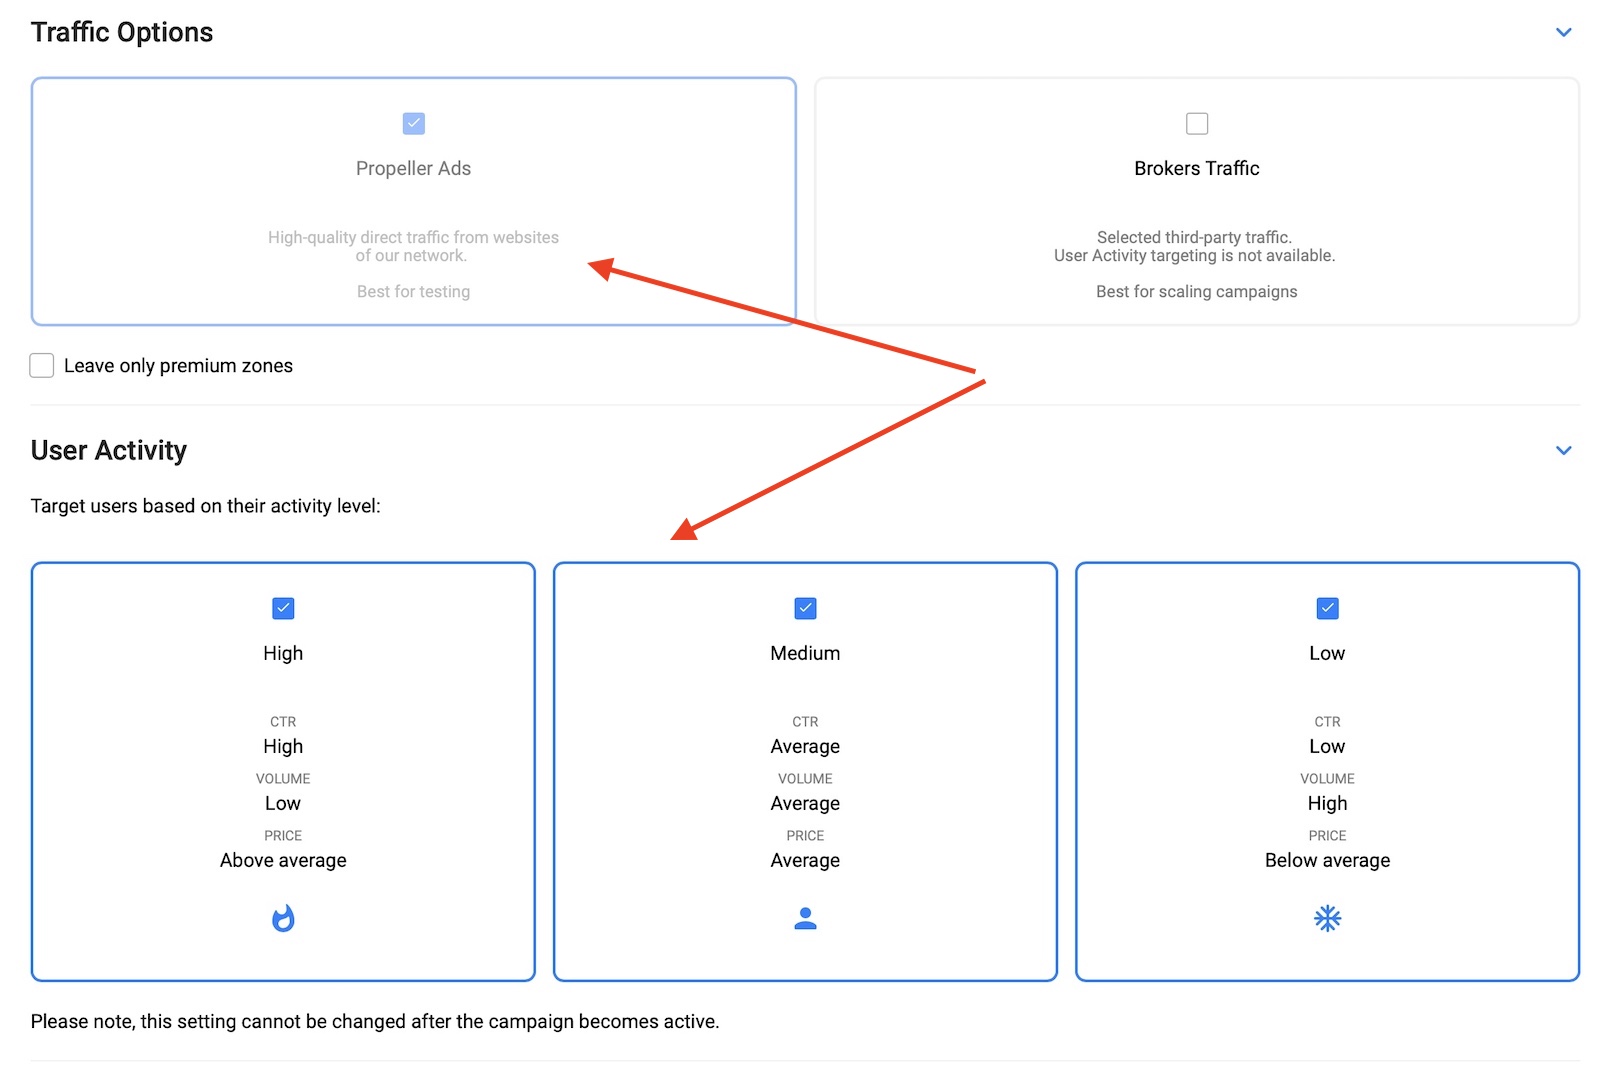
Now you need to select your traffic options. I always get started with PropellerAds traffic and later, if the campaign works, I might add broker traffic.
As for user activity, you can choose three types according to the average CTR and activity levels. If you test a new campaign you can select them all, but ideally, you want to create different campaigns for each activity level as the bids are also different and the CTR and other engagement metrics can vary widely between them.
Let’s scroll down to the next section:
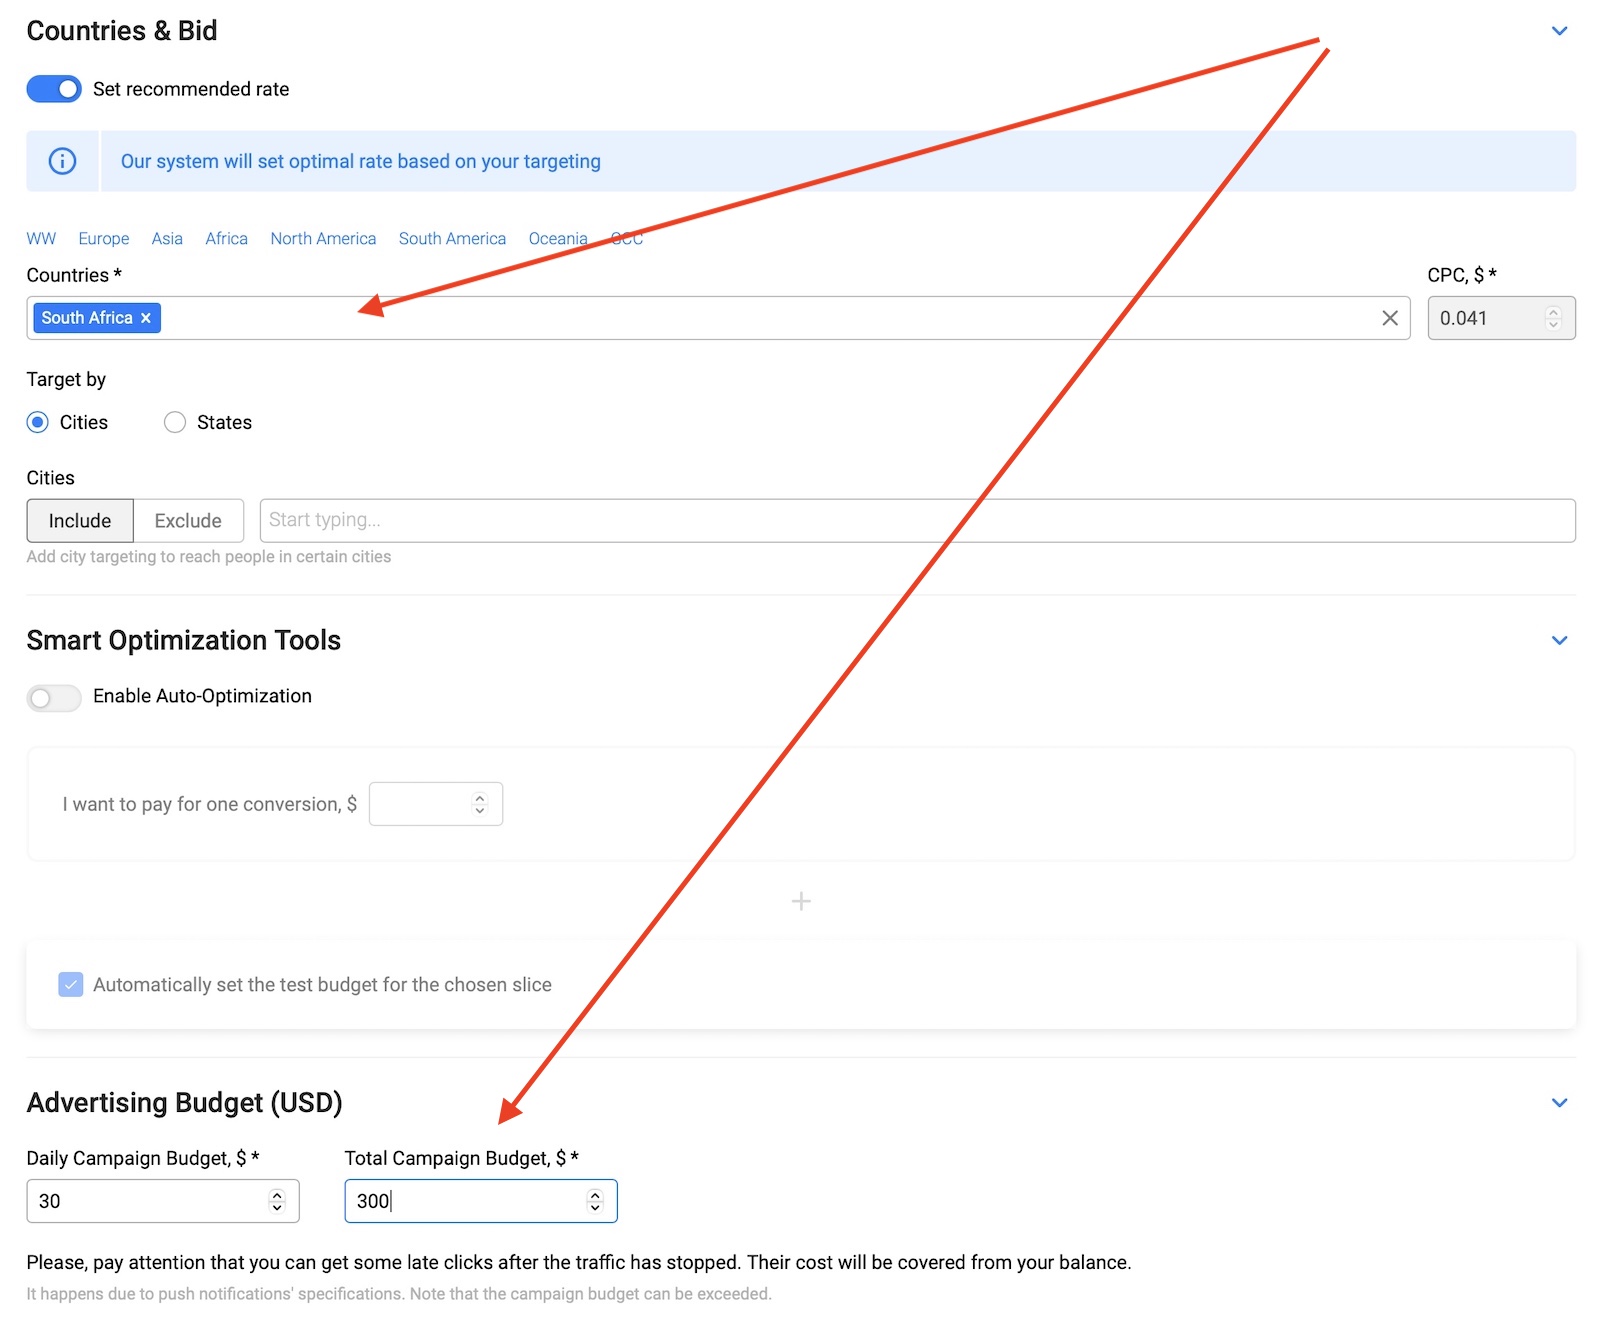
Here you need to select the country you’re going to buy traffic from. You can also target cities, but I don’t recommend it unless your offer is limited by city. If you’re running mVAS from Golden Goose your main filters are going to be defined by devices and carriers.
Leave the smart optimization tool disabled for now and select a daily budget according to your offer payout (e.g. 5-10x your payout). You can also input a total campaign budget if you want to spread that traffic between several days or just input a very large amount and pause/unpause your campaign as needed.
Let’s scroll down to the targeting settings:
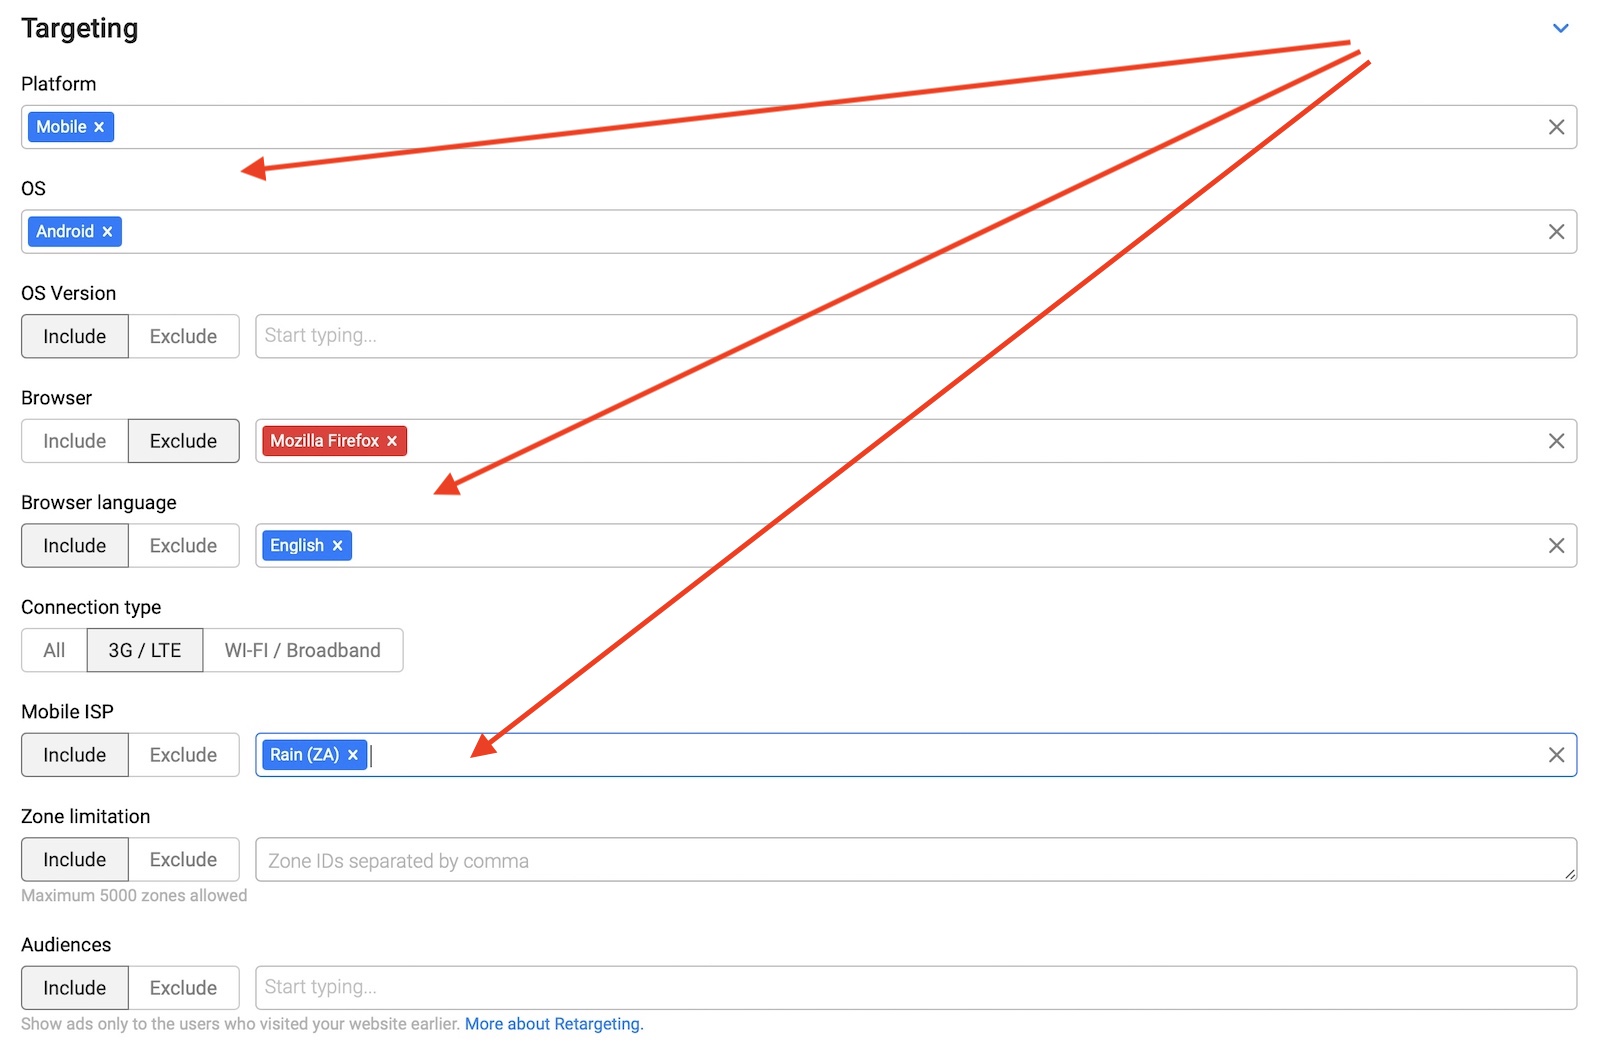
Here, you will need to select all of the targeting filters according to your offer limitations, including:
- Platform
- OS Device
- Browser
- Language
- Connection type
- Mobile ISP/Carrier
- Zones
I choose some settings just to give you an example but your setup will look different depending on what you’re promoting.
Being the first on the market, PropellerAds released Demographic and Interest targeting for push ads. So you can also target your push campaigns by user age, gender and interests. Make sure to use Traffic Estimator. It helps you evaluate the potential audience size available for certain targeting settings.
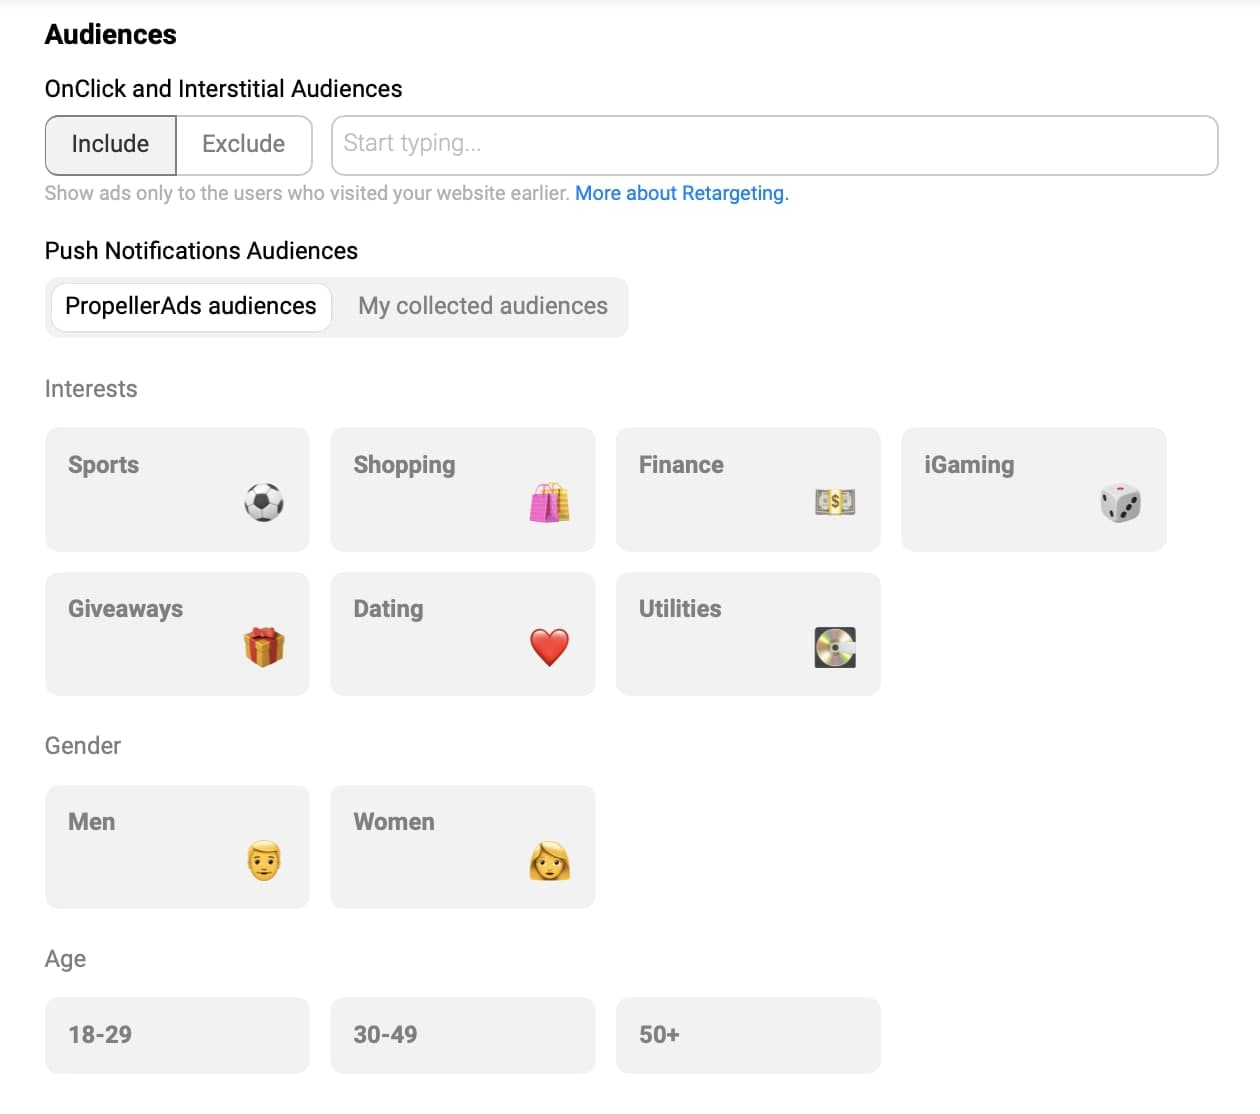
Let’s move to the next section:

You can leave this empty for now. Collecting audiences for retargeting is an advanced option that you probably won’t use in your first campaigns. Scroll down to the creatives section:

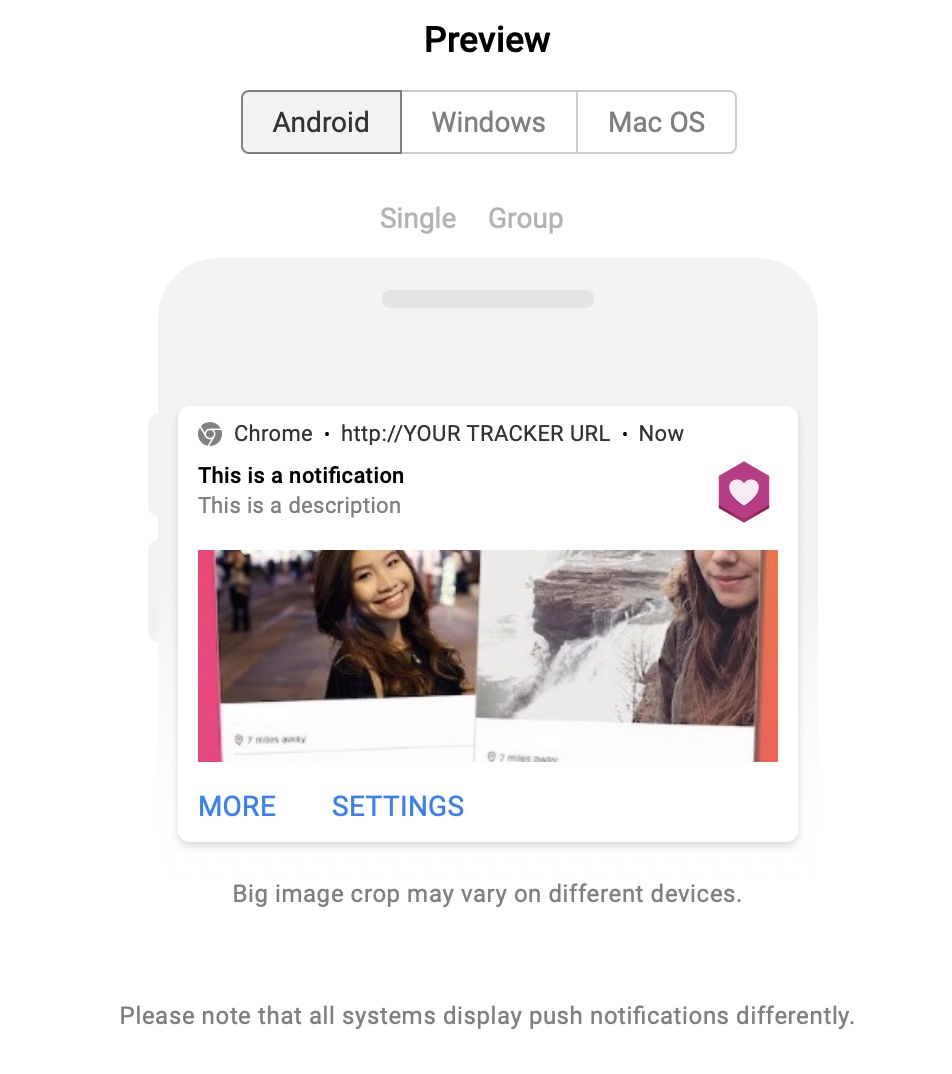
Finally, you can add your creatives here, including the title, description icon, and image. Every time you start a push notification campaign, I recommend you to start at least with 3-5 different creatives to split test them and see if one performs better than the other.
PropellerAds as well as many other sources allow you to add ten creatives or more. If you can add 5+ creatives, all with different icons or headlines, you will test different marketing angles for your campaign and eventually find a winner between them.
The winner will be defined by the CTR and conversion rate of each creative. Great creatives have high CTR and good CR. A bad creative has low CTR and low CR.
You can always preview your creatives as they would show on Android, Windows, and macOS. Make sure the creatives stand out and look like real notifications.
Besides that, whenever you are changing or setting your campaign targeting options, you can see the estimated traffic chart on the right side of your screen:

Once you have uploaded your creatives, save and send your campaign for approval.
PropellerAds is very fast in terms of approvals and your campaign is launched a few minutes later. If any of your creatives is rejected you will get an email explaining why it happened so you can tweak it and submit it again.
Search
 Searching...