
Discover all the affiliate secrets from the mVAS perspective!
Affiliate marketing from Beginner to Advanced
-
Part 1 - The basics of affiliate marketing
-
Part 2 - The affiliate network
-
Part 3 - Tracking Lessons
- Intro
- Adding Golden Goose network to your tracker
- Adding Golden Goose offers to your tracker
- Placing a Global Postback
- Placing postbacks for individual offers
- Adding landing pages to your tracker
- Adding Traffic sources to your tracker
- Building a campaign in your tracker
- Configure traffic back Campaign URL
-
Part 4 - Market Research and landing pages
-
Part 5 - Pop Traffic
-
Part 6 - Push Traffic
-
Part 7 - Additional Resources
Launching a pop campaign on PopAds
PopAds is another very recommended ad network that focuses solely on pop traffic. I want to go over how to create a campaign here as well so you have at least two options to get started. Some of the advantages of PopAds are:
- Even more targeting filters
- Lower minimum deposit
- Relaxed moderation rules. PropellerAds is more strict
Create your PopAds account and validate it. It’s important to note that in both traffic sources and also with your affiliate network, you can’t and should not have multiple accounts.
Having multiple accounts under the same name or IP could trigger bans unless there’s any specific reason for it. Especially if your account is new, use your real name, email, and data and keep it as real as possible or you might end up banned.
Once your account has been validated, log in to your dashboard and add some funds. Once the payment is done, it takes a few seconds or sometimes several hours to get it approved for new accounts.
Now let’s go and create a campaign. Click the “new campaign” option in the left menu and this menu will appear:

Fill out the campaign name and select “single URL”. Input your campaign URL from the tracker in the URL field. As for the rest, I recommend you leave everything as is. However, if you are running a campaign that contains adult content on your landing page, mark that option.
Now click the “budgets” menu:

Here, you can set a maximum bid (similar to the smart CPM bid on PropellerAds) and a daily budget. Set up your daily budget and also assign a budget (from your deposit) for the lifetime of the campaign. You can come back and change this later.
As for the maximal bid, right now you can leave it blank because we need to set all the targeting filters to get a recommended bid first.
Now click the categories menu:
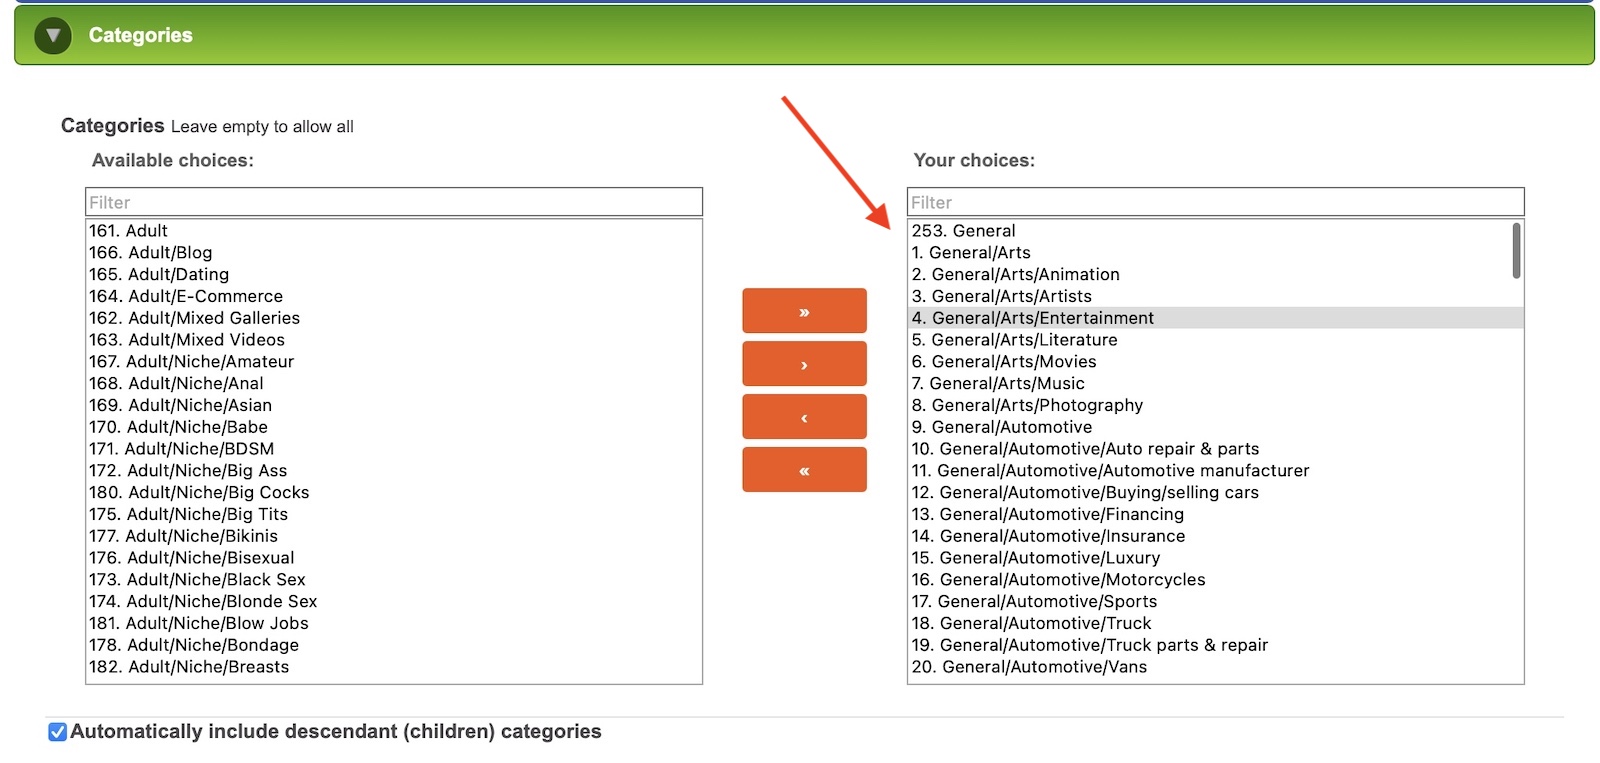
Here, you have tree choices at the beginning. If you’re running a mainstream campaign, select all the “general” categories. If you’re running an adult content campaign, select all of the “adult” categories, or if your offer accepts both types of traffic, leave them all to get traffic from both types of websites.
Now let’s move to the “country targeting” menu:
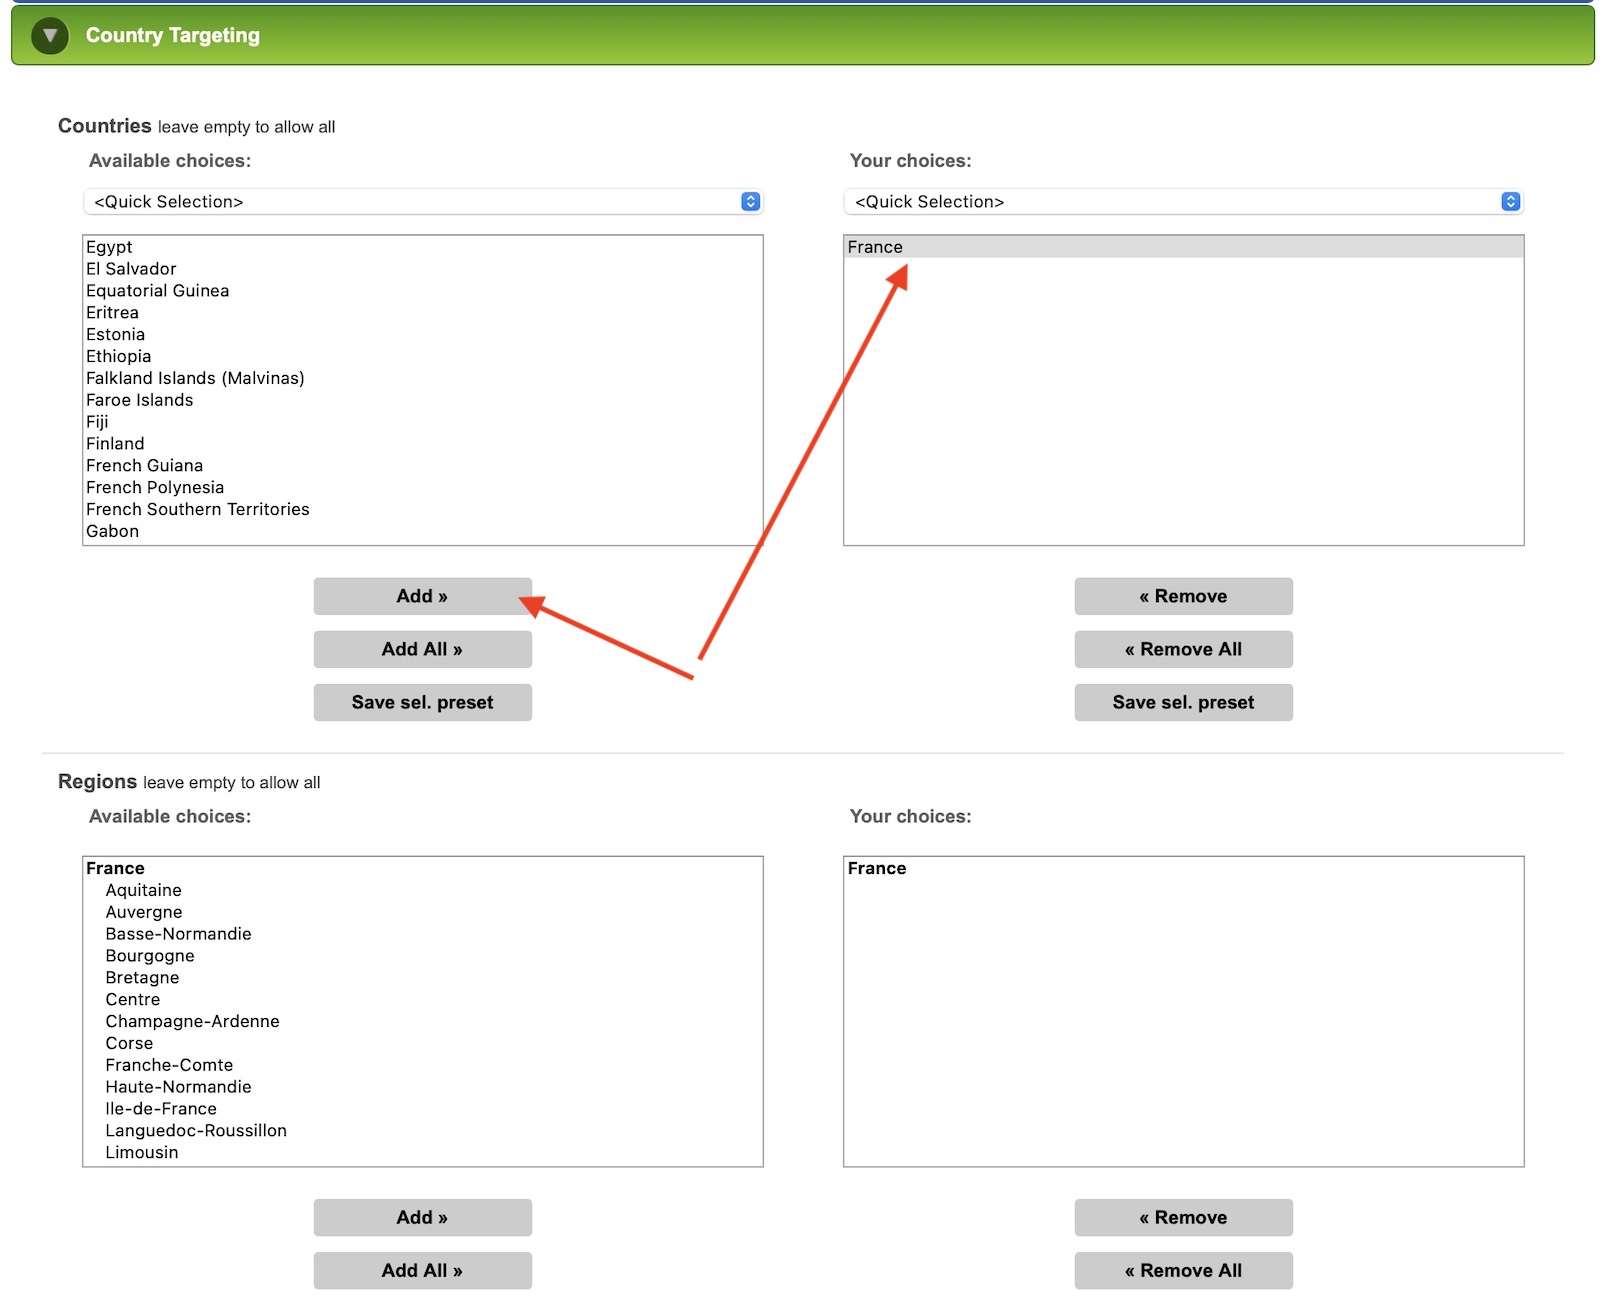
Here, you just need to select a country to target. Again, please remember it’s better to run one campaign per country and device type instead of multiple countries in the same campaign. Now go to “environment targeting”:
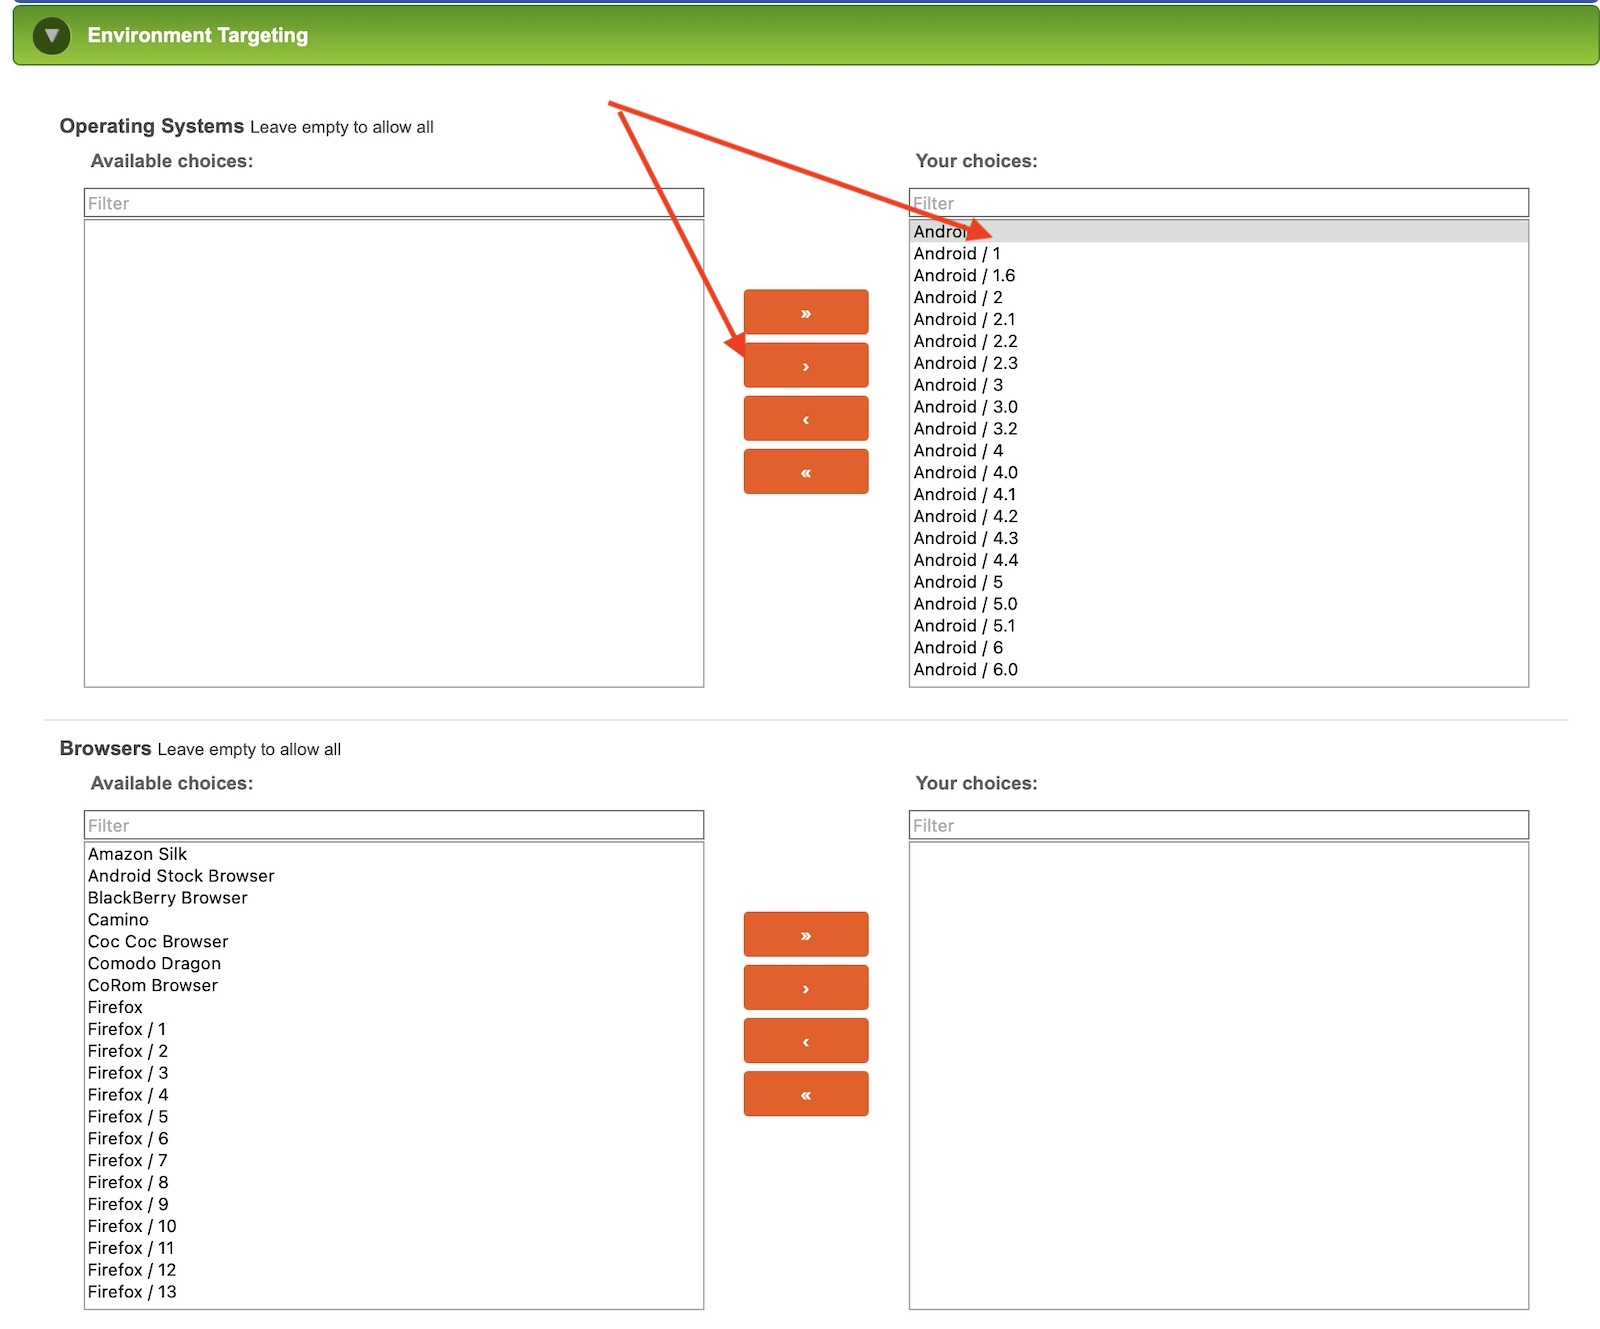
Here you need to select the OS and browsers you want to target. If you don’t know which OS or browser you want to test, leave them all as it is by default and you’ll target them all at once. Later you can come back and remove the ones that aren’t working for your campaign.
Now let’s go to “device targeting”:
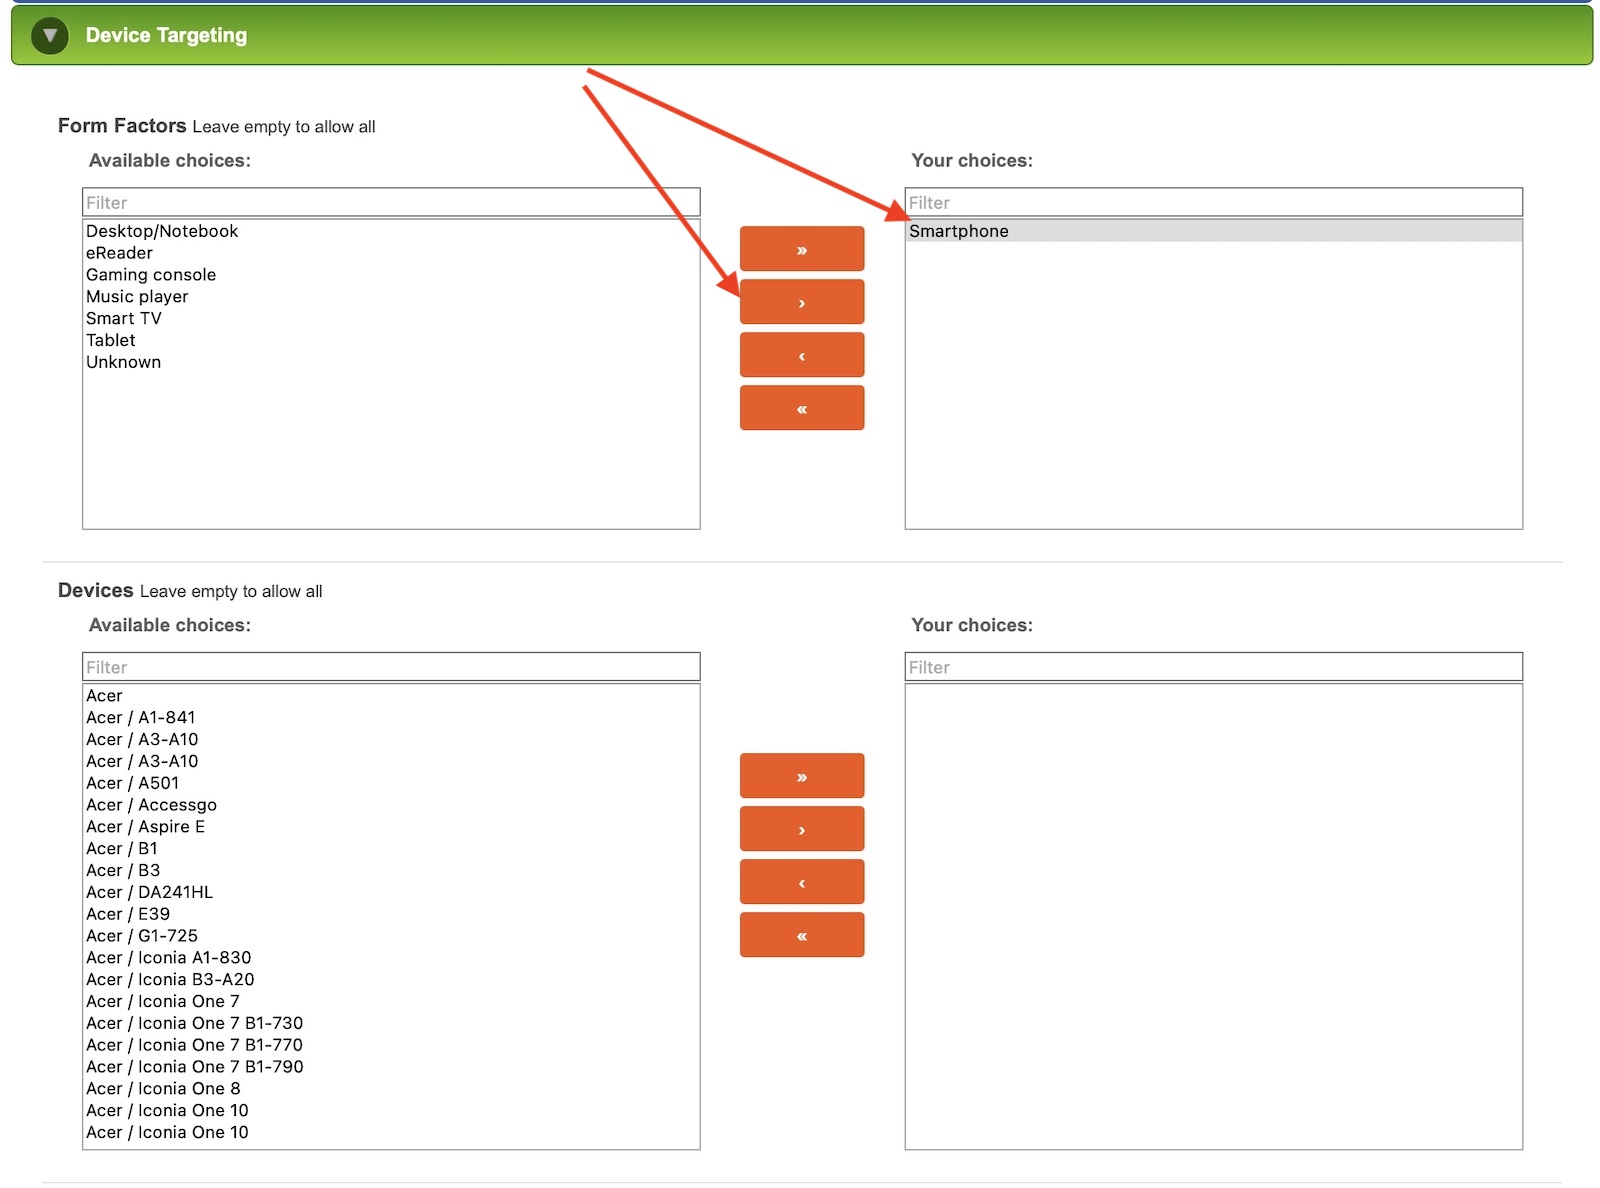
Here you need to select the form factor (device type) and you can also select specific devices, such as a specific phone model from any brand. In my opinion, you should only select a form factor here, such as desktop, smartphone, or tablet, and later come back with your campaign data to see if you can block specific devices that aren’t converting.
Now move to “connection targeting”:
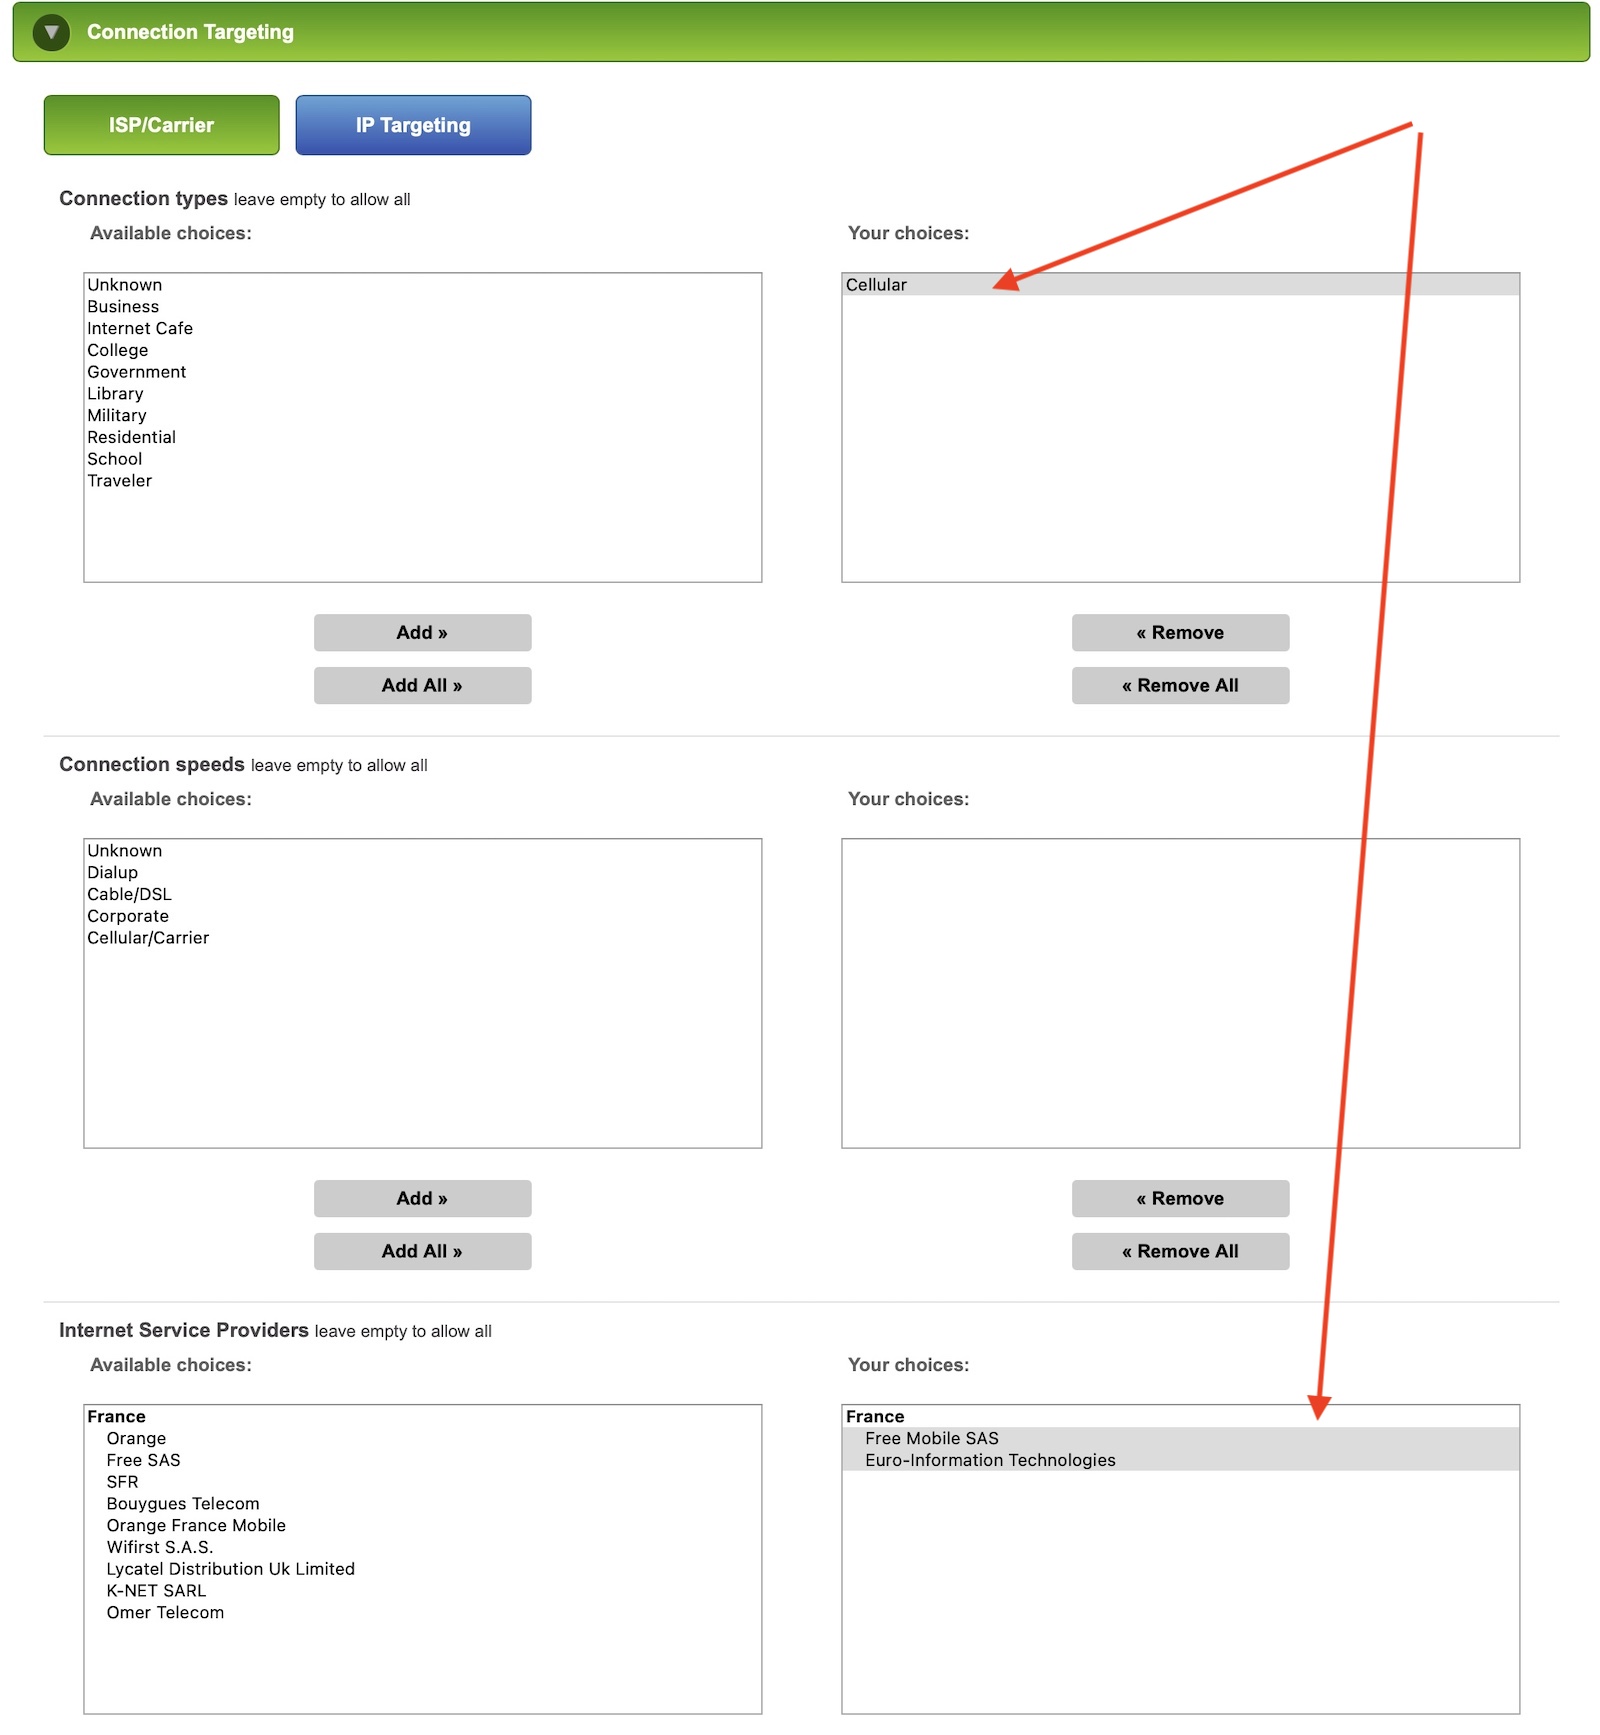
Here, you need to select a connection type in case your campaign only works for certain carriers. Choose “cellular” for the connection type if you’re promoting an mVAS offer that only works for certain carriers and you will be able to select the carrier companies as well.
If your offer works for WiFi traffic or it isn’t an mVAS offer, just leave everything blank here to target all connection types and later block the ones that aren’t working for your campaign.
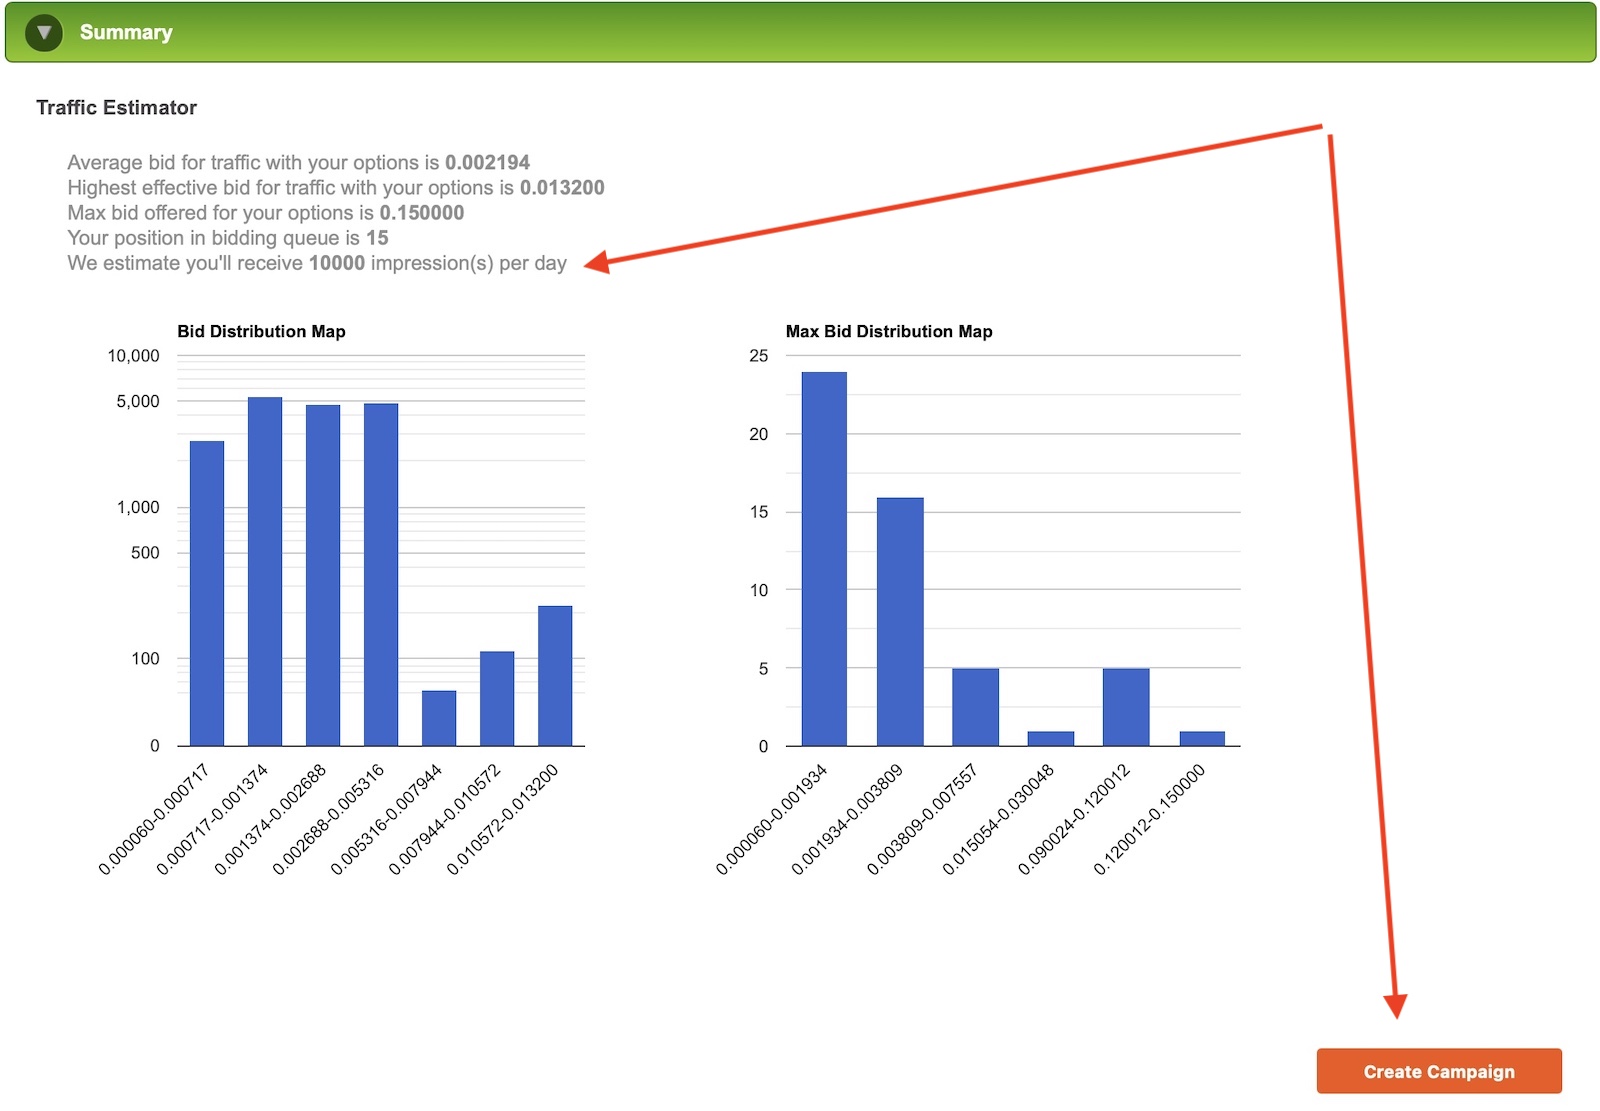
We will skip the rest of the menus because right now you don’t need to block websites or choose a time/hour for your campaign. That will be done later. Go to the final menu called “summary”:

Here, you will see a traffic estimator with data from the average bid, highest effective bid, and the max bid offered within your targeting options. If you didn’t put any bid in the “budgets” menu, you will see there are no estimated impressions per day.
Now that you know the average bid, go and put something around that number in the “budgets” section. Don’t be confused with the bids though. PropellerAds showed the bids by CPM (1,000 impressions) while PopAds showed the cost per impression. So if PopAds says the average bid is $0.0006, for example, it means the CPM is $0.6 at PropellerAds.
Go back to the “budgets” section and input your desired bid and then go back to the “summary” section. You will now see an estimated number of impressions (pops) per day.
Now you will be able to create the campaign and the reviewers will approve it in 24-48 hours max.
Once your campaign is approved you will see the traffic and costs in your tracker and you will have data to start doing optimization.
Congratulations! Now you know how to create popunder campaigns in 2 different traffic sources.
Search
 Searching...